Question/Topic: How to customize PO Organizer Pro?
"We are interested in your Purchase Order Organizer.However, before we
buy, I have a question. How would I set up the database so that I would
record a `budget amount# by `project number# and then have the
corresponding PO#s related to that project subtracted from the `budget
amount#?"
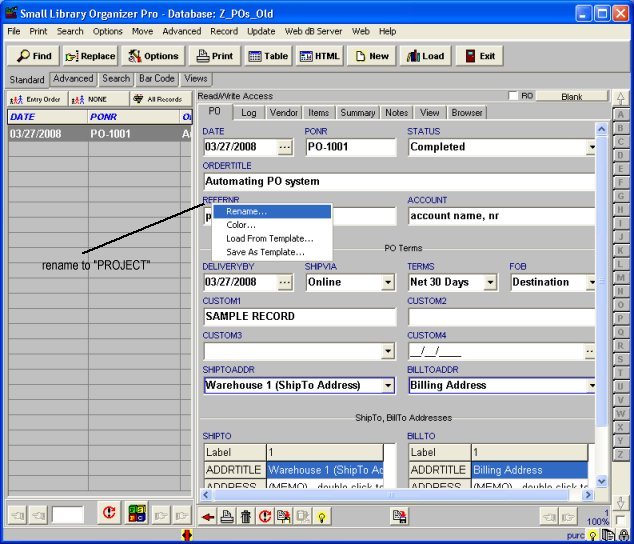
Step 1
- rename field
REFERNR to
PROJECT
- click with left mouse button on
REFERNR, select
Rename.., enter
PROJECT, click
OK
- this field will be used to link
PurchaseOrders Database with a new
Projects database
Step 2
- create new database:
Projects
- database structure:
FieldName, FieldType, FieldLength
PROJECT, text, 80 characters
DATE, date,
MANAGER, text, 80 character
CUSTOM1, text, 80 character
CUSTOM2, text, 80 character
BUDGET, numeric
AMOUNTSP, numeric
AMOUNTLEFT, numeric
NOTE memo
EXPTABLE, text, character 1 (specilized data field will display values from PO database)
- close
Organizer Pro, open
Designer, click
Create New Database
- click
New Field, enter field name, select field type, enter field length, click
OK, repeat this with all fields
- you should have the following:
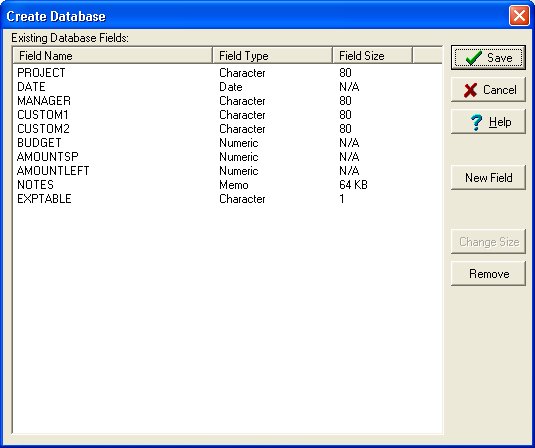
- click
Save and enter
Projects into
Database Name box
- the
Field Layout Designer window is opened
- you will have to define the following data entry control types:
- just click on the check box in front of the field name and then select the control type that is listed below (
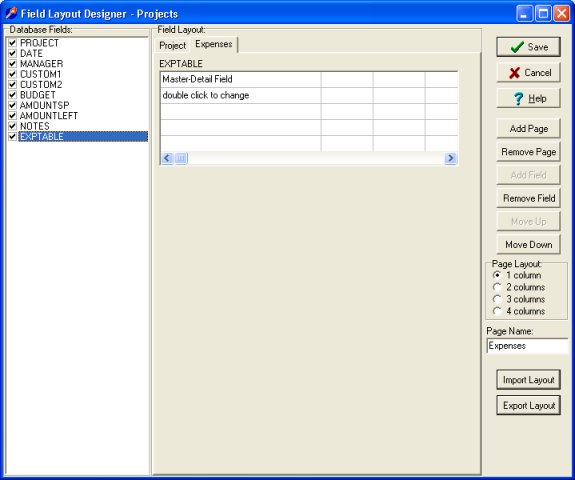
note: before you select the last field
EXPTABLE click on the
Add Page, this fied should be displayed on the separate data page)
| FIELDNAME |
DATA_ENTRY_CONTROL_TYPE |
| PROJECT |
Simple |
| DATE |
n/a |
| MANAGER |
Drop-Down List |
| CUSTOM1 |
Simple |
| CUSTOM2 |
Drop-Down List |
| BUDGET |
Numeric |
| AMOUNTSP |
Numeric |
| AMOUNTLEFT |
Calculated, enter formula: @5-@6 |
| EXPTABLE |
Master-Detail Update Field |
- if you did right your should have the following data field on the first page:

- click Add Page, click check box in front of
EXPTABLE field
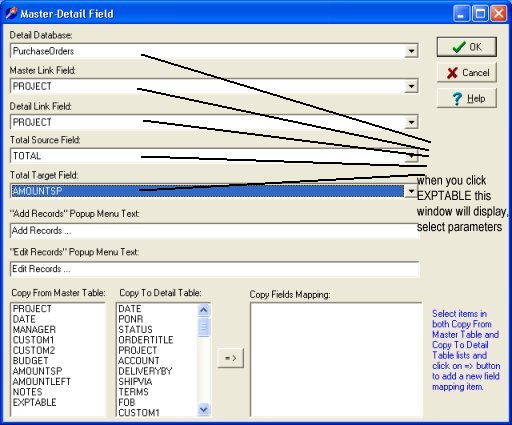
-
EXPTABLE field is a specialized field, when you select Master-Detail Update Field, you will have to define some parameters: Detail Database, Master Link Field, Detail Link Field, Total Source Field, Total Target Field. Just select the values that are displayed in the following window:
- click
Save to save the field layout and field definition files
Step 3
- redefine field in the PO database
- open
Designer, click
Create/Modify Data Fields Layout, select
PurchaseOrders database
- click with right mouse button on the PROJECT field, select
Change Field Type
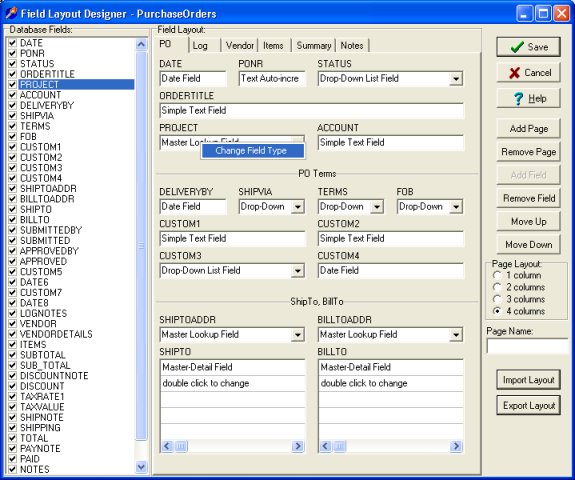
- select Master LookUp Field

- select
Projects database and
PROJECT data field

- click Save
Step 4
- close
Designer, start
Organizer Pro
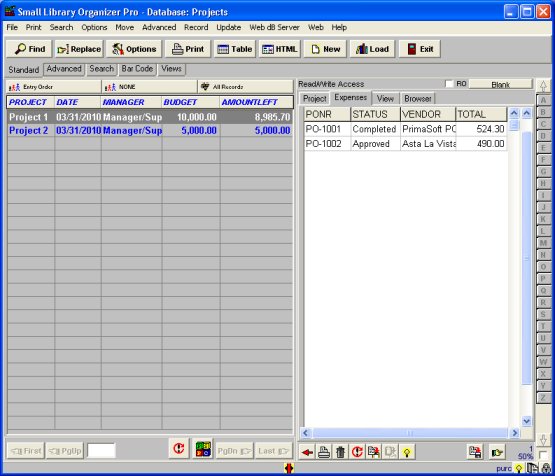
- open Projects database
- Projects database with sample records: