Organizer Pro Solutions, how to start: > Textbook Organizer Pro:
Question/Topic: Textbook Organizer Pro, how to start?
How to start using Textbook Manager Database for Windows?Step 1:
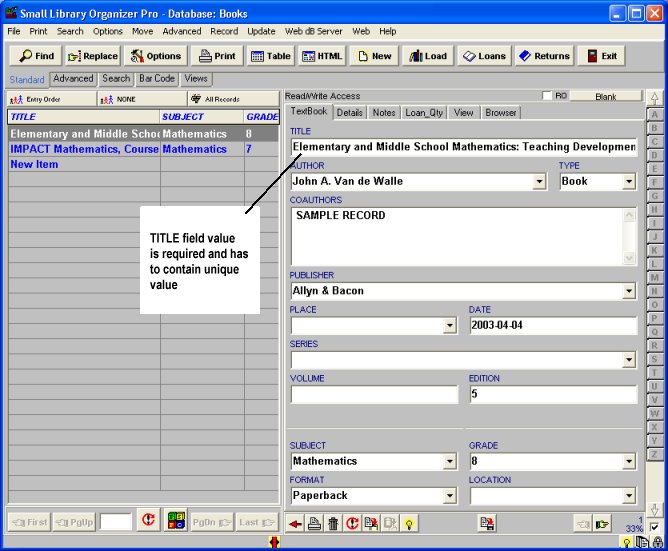
Enter school textbooks data into Books database.
Requirements:
Notes:
Enter school textbook data
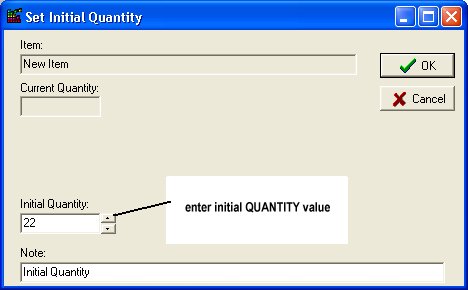
Enter textbook initial quantity
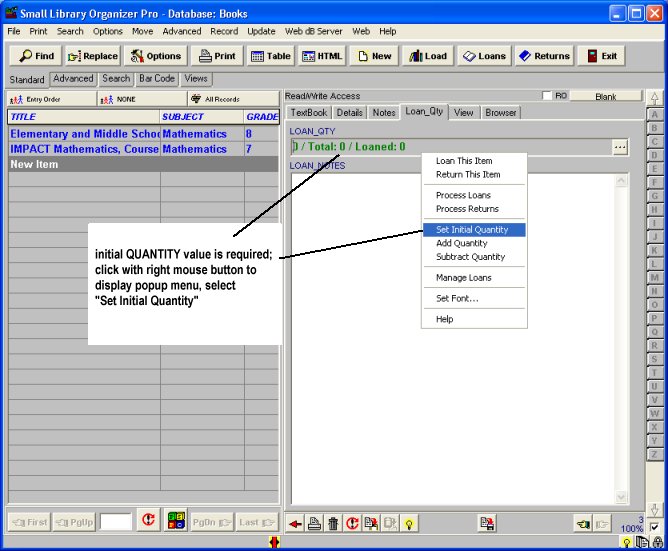
Enter textbook initial quantity
Step 2:
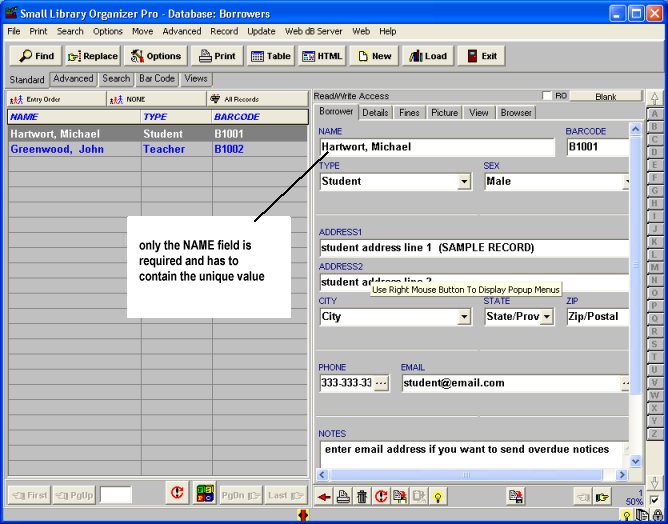
Enter students and teachers data into Borrowers database.
Requirements:
We know that many small schools do not use barcode scanners and barcode labels when processing check in/out transactions. In order to support this feature our library system requires unique entry into NAME field. Values of the NAME field have to be unique.
If you have 2 or more borrowers with the same names, enter them in the following way:
"John Green 1"
"John Green 2"
Enter your library borrowers
Step 3:
Define due date (default value is 290 days - the whole school year), fine(optional) and barcode(optional), and other textbook loan parameters.
Step 4:
Your textbook management inventory system is ready to process loan and return transactions.
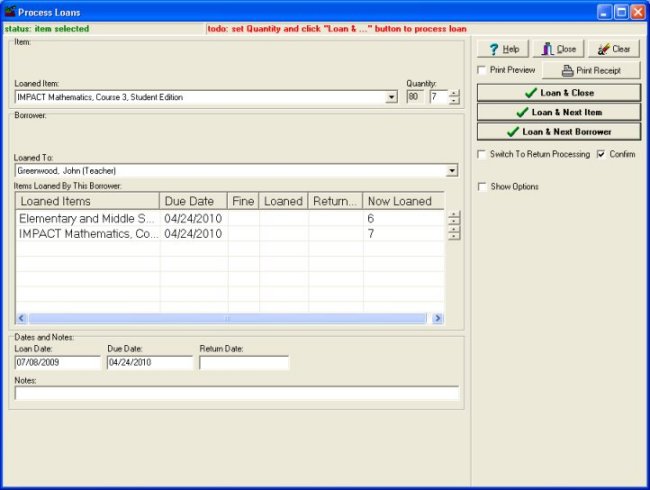
Loan management window, select borrower, select item, enter quantity loaned (manual selection/entry mode):
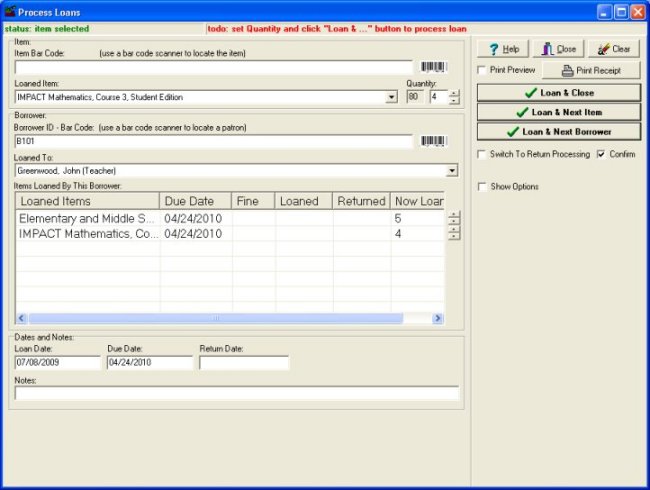
Loan management window, scan borrower id barcode number (or enter id manually), scan item barcode number (or enter manually), enter quantity loaned (barcode entry mode):
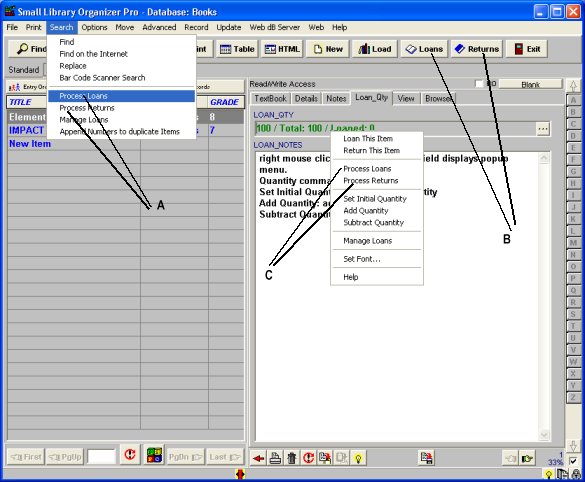
Three easy ways to access Library circulation features (Start Textbook inventory software solution and load Books database)
Check In/Out Transaction module allows to process loan / return transactions without launching library software. Your library databases are protected from unwanted modifications and users.
Related software (Read/Download) :
Related Topics ...
Related software (Read/Download) :