Important

  • Organizer Advantage and Handy Managers are replacing Deluxe/Pro software.
  • We recommend our new software to Windows 10, 11, and above users.
  • We continue supporting all Deluxe/Pro users but do not plan to release updates.

New Software for Windows: review, download, and test


Compare


Organizer Deluxe & Organizer Pro Help Center

   Database Management FAQ : Print Labels : Print Address Label

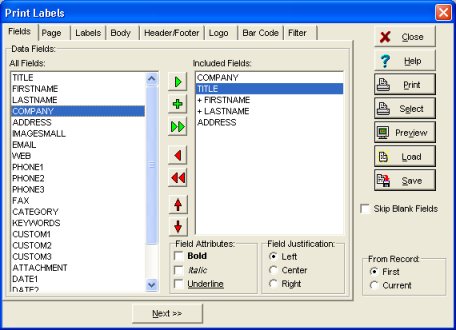
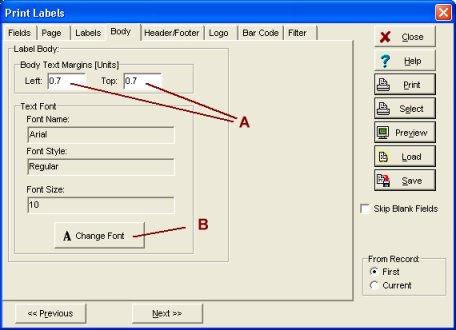
Question/Topic: How to print address label ?

  1. This explanation is based on the Address Organizer database solution. On the Print menu, click All Records/Print Labels (A) (it will print labels for all records). To print only one label for the selected record click on the Printer (B) button.
  2. On the Fields page select data fields that you want to include on the label. To select the field: highlight a field on the left-side list (All Field box) and click on the Green Arrow button. If you want to include the next field in the same line click the Plus button. In our sample the following data fields are selected:
    COMPANY
    TITLE
    +FIRSNAME (will be included in the same line as TITLE field)
    +LASTNAME (will be included in the same line as TITLE field)
    ADDRESS
  3. To select a label format click Labels tab. Click on the Label Type dropdown box and select a label type that you are using (all major Avery label formats are predefined). Check the number on the labels box to find out which label type you are using. If you can't find the number in the list you can try to select the label type that has the same number of labels in a row and in a column. You can check the web site of the label producers, very often they include the mapping tables (the list of their label numbers with corresponding Avery label numbers). To print address label we use Avery type AV 5163. This type is selected in our lesson.
  4. After the label report has been created you may want to test it by clicking on the Preview button. If you are not satisfied with the report adjust the report options and Preview it again.
  5. Usually when you define your labels you will want to change the text font size and type and the position of the text on the label. On the Label Body page select the font type and size and/or starting position (Left margin and Top margin). Click Change Font button to select font type, font style, and font size.
  6. When you are satisfied with the report you can Print it on the Windows current printer by clicking on the Print button.
  7. If you think you may want to use this label setup (database field selection, label layout, label type selection,..) in the future save the label Report as a Label Template by clicking on the Save button. Later you can reuse the saved Label Report by clicking on the Load button.

Related software (Read/Download) :
Organizer Deluxe Series
Organizer Pro Series

Related Topics ...
How to print spine labels?


Related software (Read/Download) :
Organizer Deluxe Series
Organizer Pro Series


Copyright © PrimaSoft PC, Inc. All rights reserved.