Question/Topic: How to print spine labels ?
There are 2 ways you can enter your CALL numbers and then print them correctly on the spine label.
-
Use CALL number data field, separate parts of your call number with SPACE character: click here
-
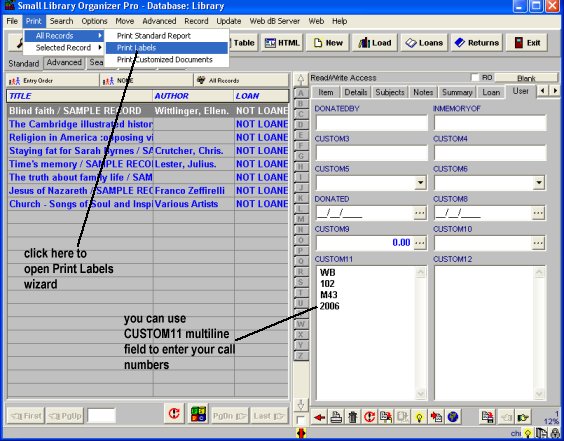
Use multiline data field (example: CUSTOM11 on the User page), enter parts of your call number in separate lines: click here
1.
Use CALL number data field, separate parts of your call number with SPACE character.
- Enter call number data for each book into CALL data field, separate each part of the call number with SPACE character. e.g.:
WB 102 M43 2006
Print spine labels.
- On the Print main menu click All Records/Print Labels
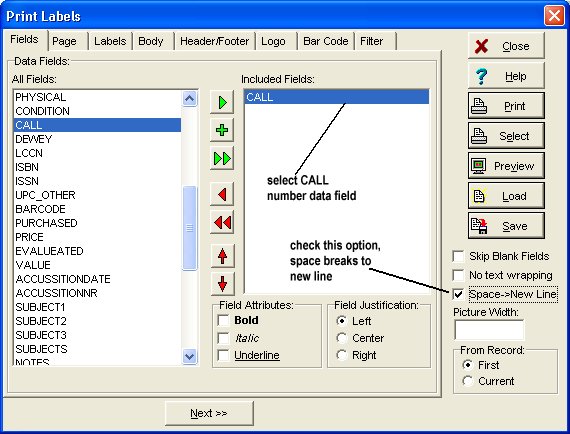
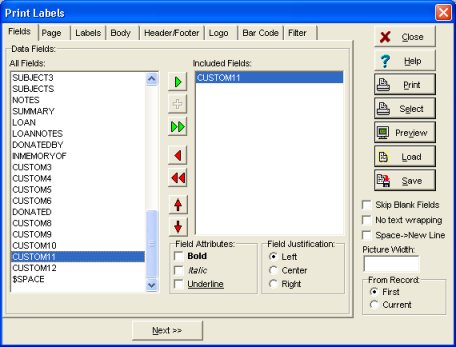
- In the All Fields box click on "CALL" number data field. Click Green Arrow button to select it.
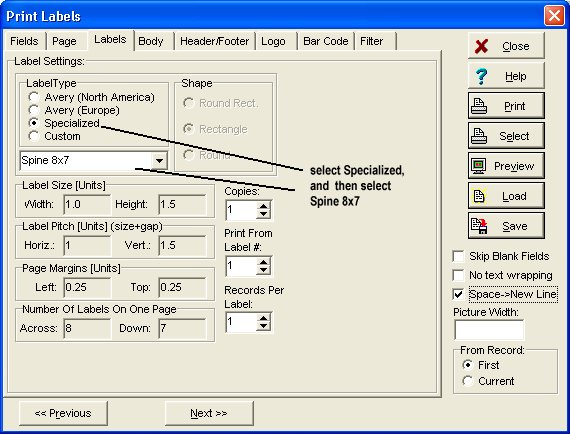
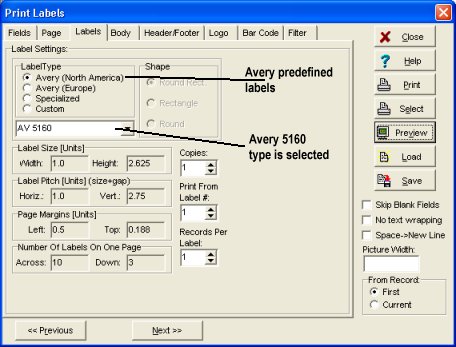
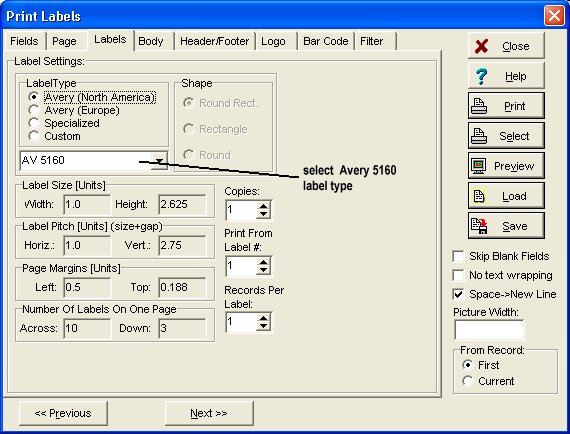
- Click on the Labels Tab and select a label type. We suggest to use specialized library spine labels "Spine 8x7" or general use "Avery 5160" (if you use other brand you can check if there is already a predefined format that is similar or the same). We found that there are many different label brands that have the same format.
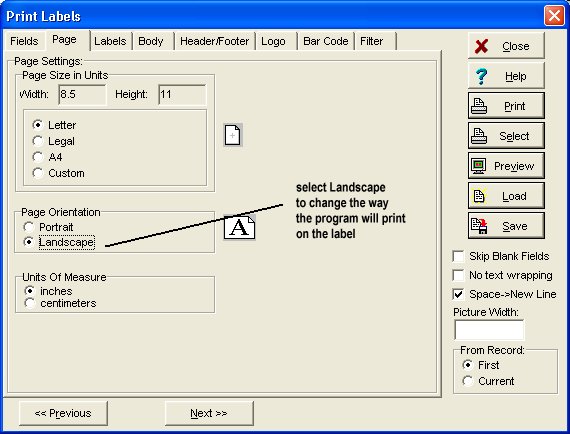
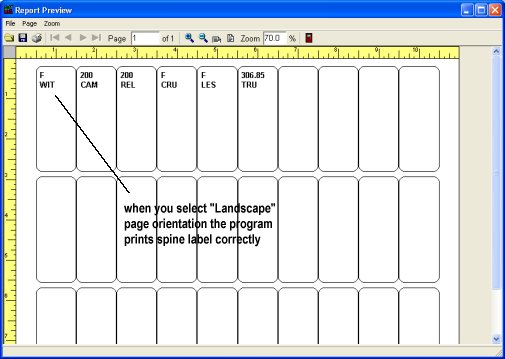
- Check orientation of the labels on the label sheet. Specialized book spine labels have horizontal orientation (height > width), general use labels that could be used as spine labels have vertical label orientation (width > height). For vertically oriented labels do the following: click on the Page Tab and select Landscape in the Page Orientation. Page orientation has to be selected after the label type is selected.
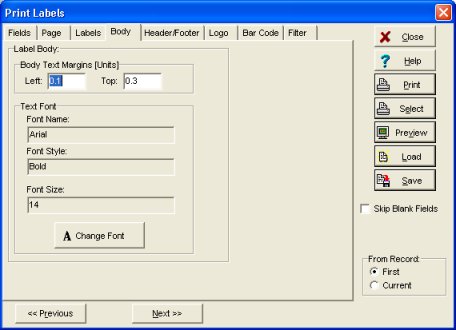
- Click on the Body Tab and enter new margin values. Enter 0.1 for the Left margin. Enter 0.3 for the Top margin. Click Change Font button. Click 14 in the Size box, and click OK.
- Click Preview to check the layout of your labels. Close Preview window.
- To save all spine label layout options click on the Save button. Later you can reuse the saved label layout by clicking on the Load button.
- Review images below.
Print spine labels: screen snapshots.
ShortNote data field used to store information that will be printed on a spine label. On the Print main menu click All Records/Print Labels.
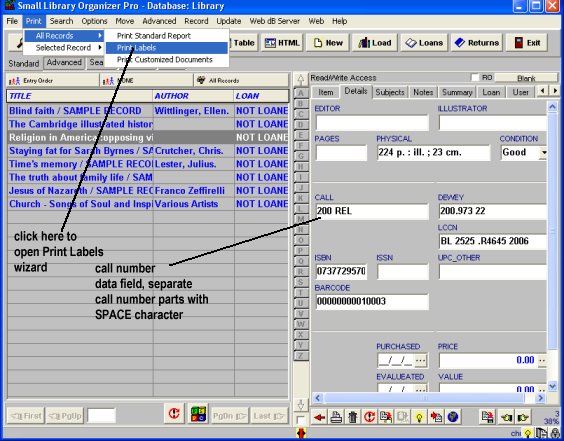
In the All Fields box click on "CALL" (call number) field. Click Green Arrow button to select it.
Click on the Labels Tab and select a label type. Select Specialized / Spine 8x7. You can also choose other types or you can define a custom type (see below).
If you do not want to use Specialized / Spine 8x7 select different type. For example you can use Avery 5160 label type.
If you are using Avery 5160 label type (vertical orientation of the labels: label width > label height) click on the Page Tab and select Landscape in the Page Orientation.
Click on the Body Tab and enter new margin values. Enter 0.1 for the Left margin. Enter 0.3 - 0.7 for the Top margin.
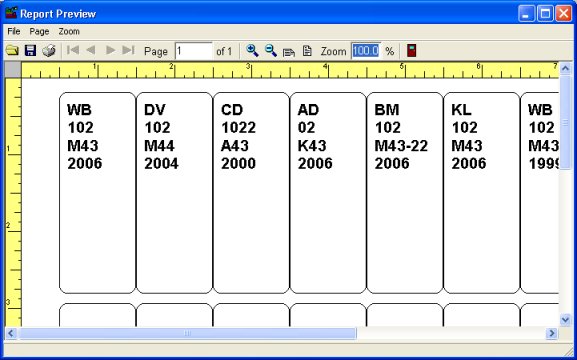
Click Preview to check the layout of your spine labels.
Specialized / Spine Label 8x7 preview:
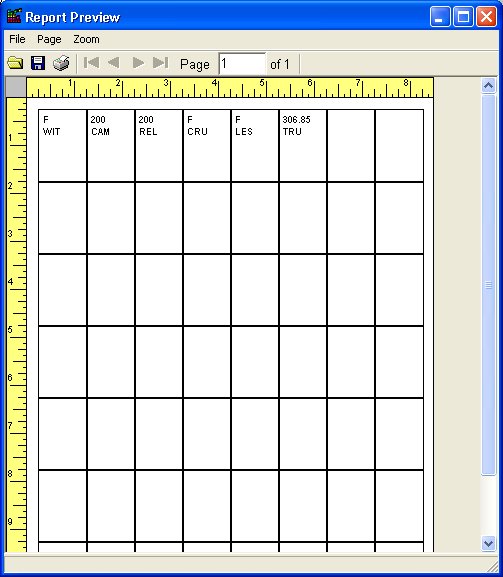
Avery 5160 preview:
2.
Use multiline data field (example: CUSTOM11 on the User page), enter parts of your call number in separate lines.
Select or create a data field that stores information printed on a book spine label
- Choose a field where you would like to store data printed on a spine label. We suggest to use the following fields in Library Organizer Pro: CUSTOM11 on the User tab
- If you use all data fields that are already in a library database you can also create a new data field.
- Enter data for each book into your "spine label" field, each value (main category, subcategory, sub-subcategory, .., year in a separate lines e.g.:
WB
102
M43
2006
Print spine labels.
- On the Print main menu click All Records/Print Labels
- In the All Fields box click on "CUSTOM11" data field (or your multiline spine label field). Click Green Arrow button to select it.
- Click on the Labels Tab and select a label type. We suggest to use Avery 5160 (if you use other brand you can check if there is already a predefined format that is similar or the same). We found that there are many different label brands that
have the same format.
- Click on the Page Tab and select Landscape in the Page Orientation. Page orientation has to be selected after the label type is selected.
- Click on the Body Tab and enter new margin values. Enter 0.1 for the Left margin. Enter 0.3 for the Top margin. Click Change Font button. Click 14 in the Size box, and click OK.
- Click Preview to check the layout of your labels. Close Preview window.
- To save all spine label layout options click on the Save button. Later you can reuse the saved label layout by clicking on the Load button.
- Review images below.
Print spine labels: screen snapshots.
ShortNote data field used to store information that will be printed on a spine label. On the Print main menu click All Records/Print Labels.
In the All Fields box click on "CUSTOM11" field. Click Green Arrow button to select it.
Click on the Labels Tab and select a label type. We suggest to use Avery 5160. You can choose other types or you can define a custom type.
Click on the Page Tab and select Landscape in the Page Orientation.
Click on the Body Tab and enter new margin values. Enter 0.1 for the Left margin. Enter 0.3 - 0.7 for the Top margin.
Click Preview to check the layout of your spine labels.