Question/Topic: Build Database / Create Template
- Read over help.
- Analyzing your data.
- Build database.
Using Designer, the process of creating a new template is quick, simple and mostly intuitive, especially if you have done some pre-planning and analysis of your data. Carefully follow the steps below and your template should be ready in no time.
Print the following table, so you do not make errors when entering field names/sizes and selecting field types and data entry control types:
| field name |
field type |
size |
data entry control |
| TOOLNAME |
Character |
200 |
SimpleText |
| CATEGORY |
Character |
40 |
Drop-Down List |
| LOCATION |
Character |
40 |
Drop-Down List |
| CONDITION |
Character |
40 |
Drop-Down List |
| VALUE |
Numeric |
|
Numeric Simple |
| PHONE |
Character |
20 |
Phone Number |
| WEB |
Character |
200 |
Web Page Address |
| SHORT |
Character |
200 |
SimpleText |
| NOTES |
Memo |
|
Multi-Line Text |
-
Start Organizer Deluxe. On the File menu, click Designer.
-
Click Create New Database.
-
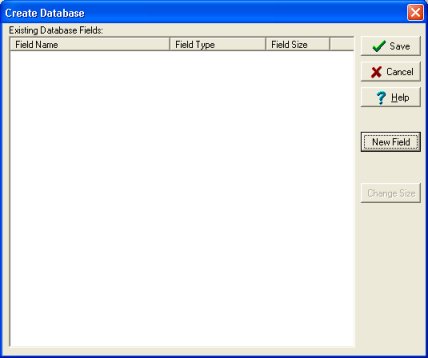
In the Create Database window, click New Field.
-
In the New Database Field window enter TOOLNAME in the Field Name box, select Character in the Field Type box, and enter 200 in the Field Size box, when done click OK.

-
Add other fields, click on New Field again and repeat steps 3-4. Create Database window with all fields should look like:

-
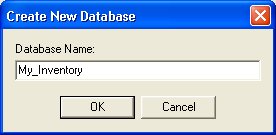
Once finished creating all of your field names, types, and sizes click Save. Next you will be prompted to enter a name for the new database. Enter the name and click OK.
-
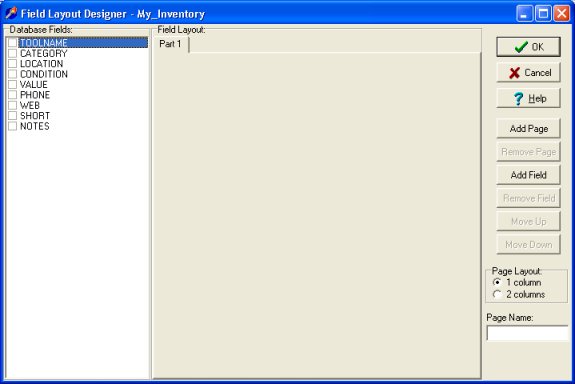
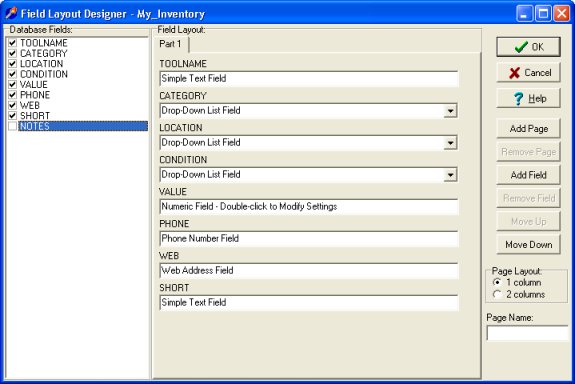
The Field Layout Designer should pop up with all of your created Database Fields on the left of the screen and a Field Layout with page one on it. The fields on the left will be unchecked initially.
-
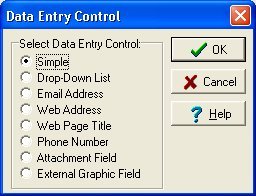
Next you should select the data entry control for each of the fields on the left. Do this by clicking on a check box in front of the Field name. This will automatically open a screen with different types of Data Entry Controls. Select the Data Entry Control as in the printed table.
-
Field Layout Desinger with the first 8 data fields.
-
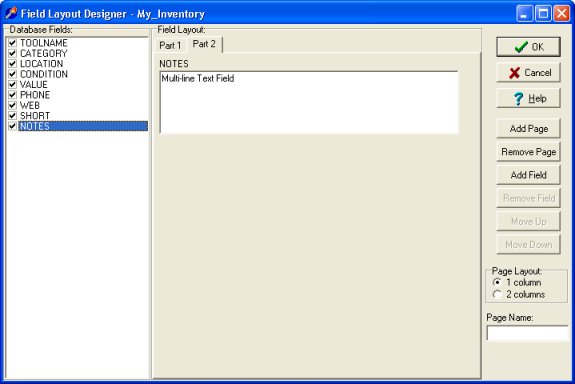
The NOTES field we would like to have on a separate data page. In order to do that clik on the Add Page button. A new data entry page is created with the Part 2 title. Select the NOTES field and choose the data entry control for the field.
-
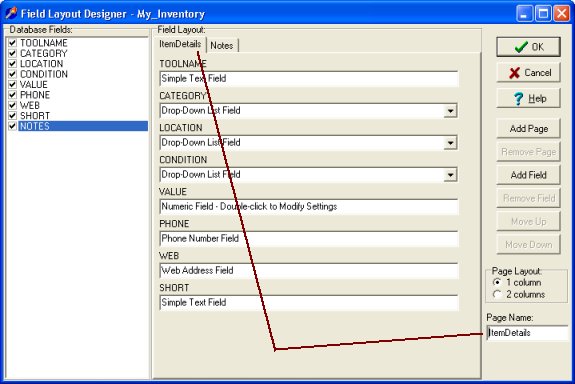
You are now almost done. You also have one other option, that is, whether you would like one column or two. This is up to you and will depend on how many fields you will like to place on one page. To make your selection, simply click on the one you like. Also you can change the names of the data entry pages. To do this just select the page and enter your new name into Page Name box. In our example there are new names for the data entry pages: ItemDetails and Notes.
-
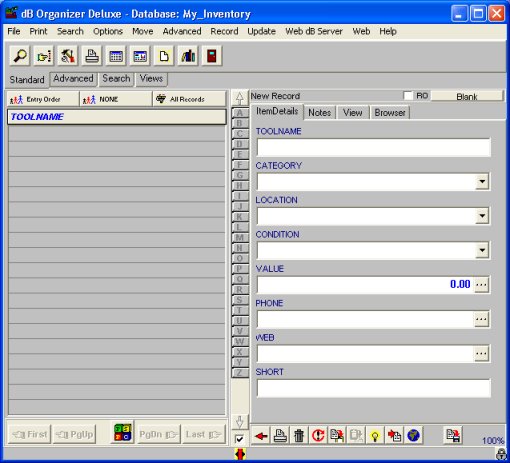
Now press OK and your template is done! Click on the Organizer Deluxe button. On the File menu, click Load. Select your template and click Load.