Organizer Advantage is powerful yet easy to use database manager for Windows.
Advantage Designer lets you modify our solutions or easily create new databases.
Take control of your data with our simple or buinsess database software solutions.
| Organizer Advantage HowTo/Help | Designer HowTo/Help |
Advantage Help > Add-Ons > Transfer > Transfer, Method 1
- Organizer Advantage
- Getting Started Videos
- Main Window
- Tabbed Toolbars
- Add Data
- Reports
- Labels
- Search, Replace
- HTML Reports
- HTML Wizard
- Import, Export
- Backup, Restore
- Options
- Statistics, Views
- Templates
- Add-Ons
- Access Add-Ons
- Viewer
- Search
- Designer
> Transfer
> Method 1
- Method 2
- Layout Scale
- How To .. - Install, Network
- Web Search, Add Data
- Premium
- Upgrade, Update
- Organizer Deluxe, Pro Users
- More
Method 1: transfer data structure, data entry forms, and import data.
You can transfer the structure of data, the data entry layout, and the data to Advantage.
In order to transfer the selected table with data you will have to do the following steps:
- Start Transfer application
- Select deluxe or pro DATA folder
- Select advantage db folder
- Select, define new data fields for the new table
- Create new table with fields created in 4
- Select layout scale and create layout
- Define data field mapping
- Transfer data from the old table into the new table
- Start Advantage, review the final result
How to transfer data from Deluxe/Pro into Advantage, Method 1:
Install Organizer Advantage
Download, install, and review Organizer Advantage:
Advantage Simple,
Advantage Business
Organizer Deluxe/Pro
Review table names and field names in Deluxe or Pro.
Organizer Advantage is using Firebird SQL database manager that has several naming restrictions.
- Table names and field names have to use only capital letters, no spaces or special characters are allowed.
- There are several restricted words that cannot be used as field names.
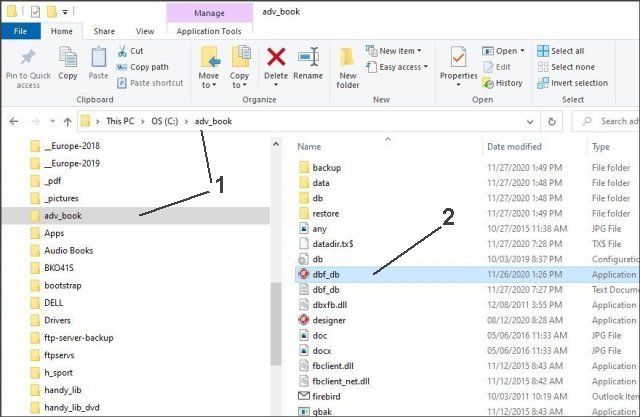
1. Start Transfer application.
To start Transfer application open Windows File Explorer, select Organizer Advantage (1) folder,
and start dbf_db.exe (2) (transfer application).
2. Select Organizer Deluxe or Pro DATA folder
Click Select (1) and go to the Deluxe or Pro installation folder and click on DATA (2) and click OK (3).
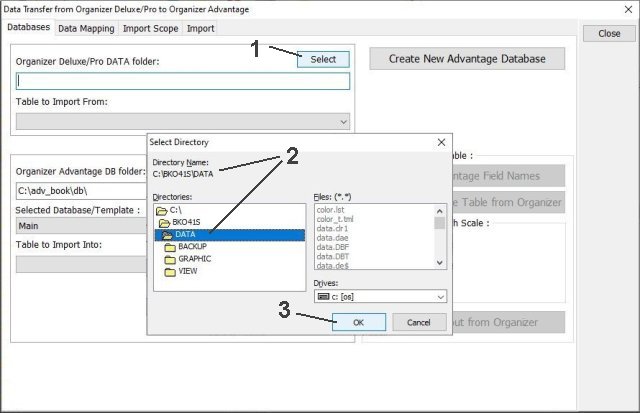
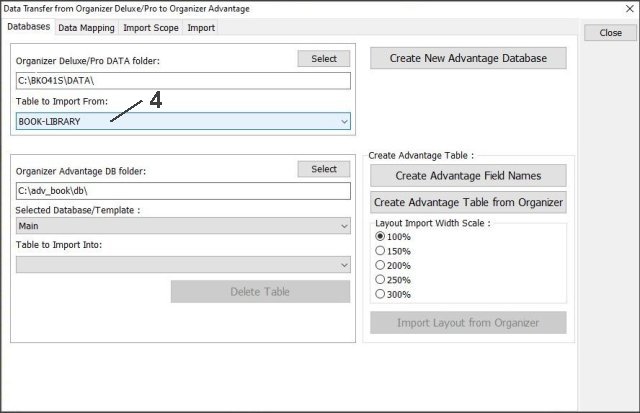
In the Table to Import From (4) box select the table that you would like to transfer into Advantage.
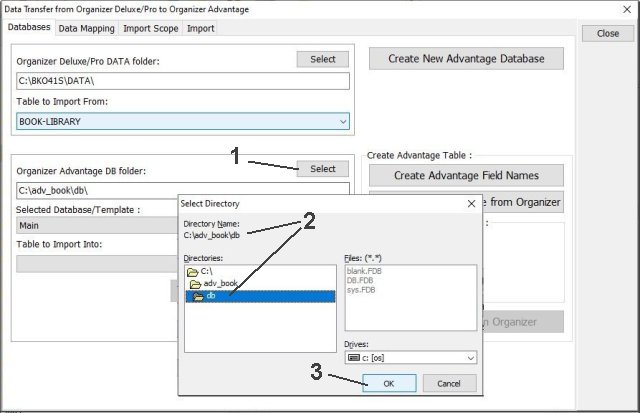
3. Select Organizer Advantage DB folder
When you start Transfer application this folder could be already pre-selected (c:\adv_YOUR\db\).
If the folder is not selected click Select (1) and go to the Advantage installation
folder and click db (2) and click OK (3)
Organizer Advantage installs with only one database. It is called Main. This database will be preselected for you in the Selected Database/Template box. In this lesson we explain how to transfer your DLX or PRO table and data into the Main database.
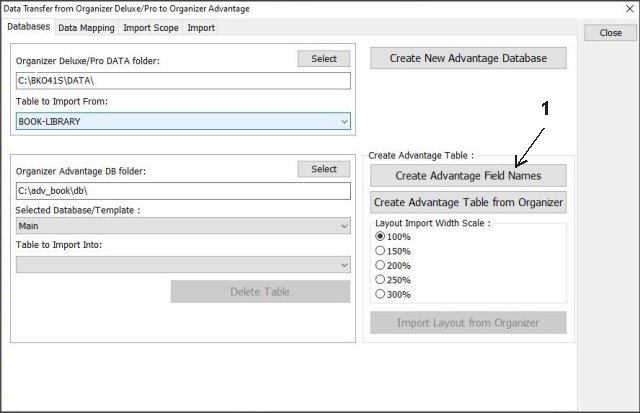
4. Define Field Names
Before you create a table you have to define the list of data fields. In the Transfer window click
Create Advantage Field Names (1).
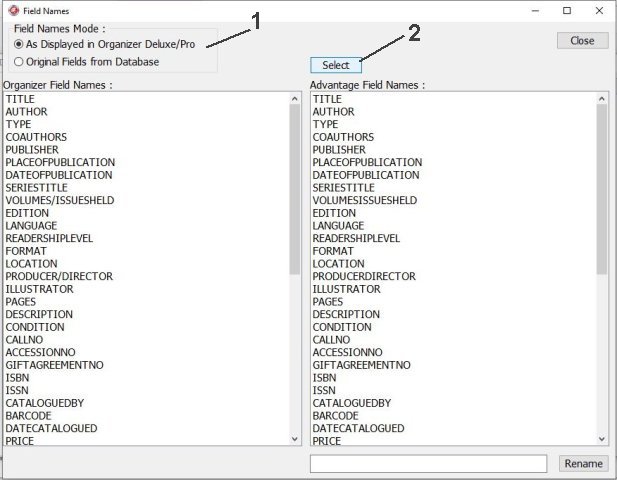
In the Field Names window select your preferred Field Names Mode (1) and click Select (2).
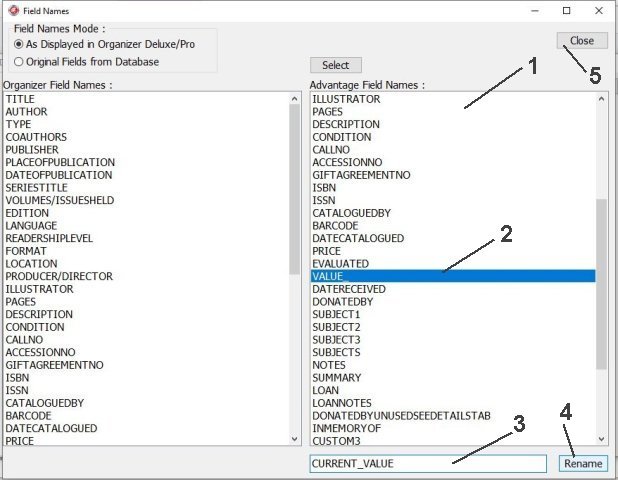
Modify Selected Names
Organizer Advantage is using Firebird SQL which has some naming restrictions.
Some words, small letters, special characters are not allowed in table names or field names.
for example:
"VALUE" is a restricted work, the transfer app will use "VALUE_"
"fieldname" the transfer app will change to "FIELDNAME"
Review new field names in the Advantage Field Names (1) box. Click on the field (2), and use the Modify Name (3) box to modify the selected field, click Rename (4). The list of fields that is listed in the Advantage Field Names box will be used in your new table. Click Close (5).
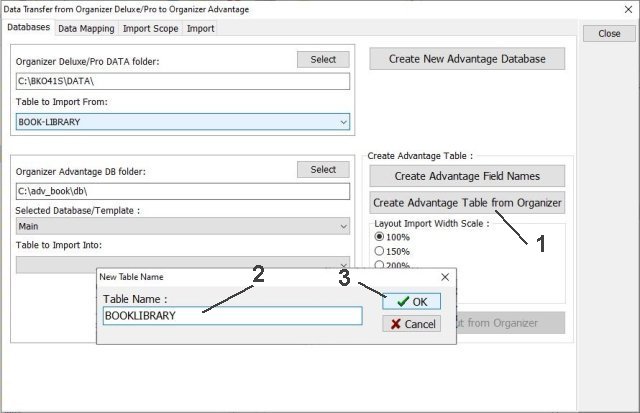
5. Create a table
Click Create Advantage Table from Organizer (1) to create a new table with the set of fields defined in 4.
Data fields will use the same type and length as were defined in Organizer Deluxe or Pro.
Enter your new Table Name (2) and click OK (3).
6. Define Layout
You can use almost the same layout that you have in Deluxe or Pro Organizer.
In Deluxe and Pro solutions, we optimized our layout designs for monitors with the 1024 x 768 resolution.
This monitor resolution was the most common 15 years ago, the time of the initial deluxe/pro release.
First, review your screen resolution and how you open your application and select your scale accordingly.
Use 100% scale: your screen resolution is low, or your application occupies only some area of your screen.
Use 150% or 200% scale: your screen resolution is high, and you display your application maximized, so it occupies the whole screen.
Use 250% or 300% scale: your screen resolution is very high, and you display your application maximized, so it occupies the whole screen.
Notes:
- You can create two tables with different scales and review how the application opens on your screen.
- We found out that 100% or 150% scale would be the best choice in most cases.
Select your layout scale (1) and click Import Layout from Organizer (2).

7, 8. Import Data into Organizer Advantage
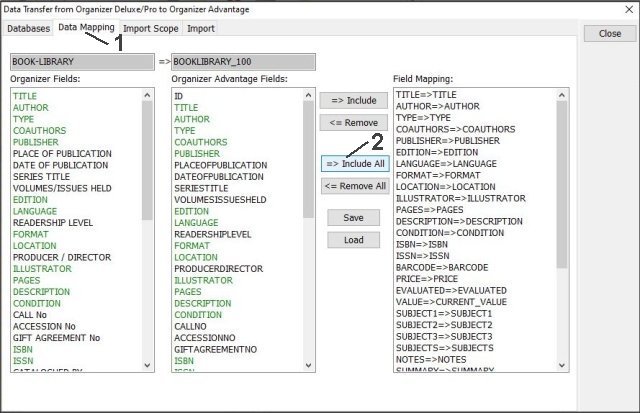
Data Mapping
Click Data Mapping (1) and define the mapping: match fields from the source and the destination tables.
Next, click Include All (2) to create the field mapping list for data fields with the same names in both tables.
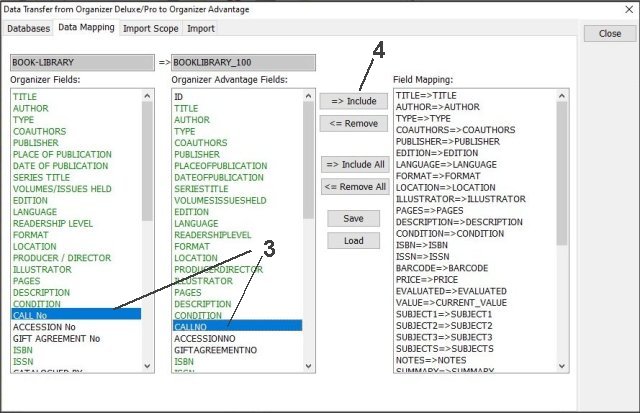
Now you can select mapping pairs for remaining data fields that use a different name.
In this case, select the corresponding data fields and click Include.
Green: means the mapping pair is selected and listed in the Mapping box.
Black: the mapping is not defined.
- Select mapping pairs for remaining fields (fields displayed in black color)
- Select the mapping pair (3) and click Include (4)
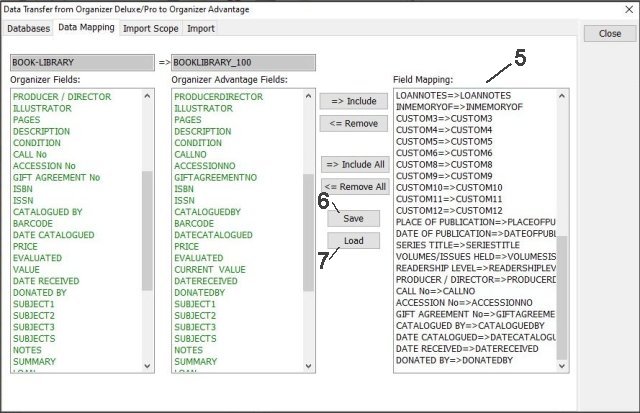
Review the Mapping (5). You can click Save (6) to save the mapping. Later use Load (7) to load the previously saved mapping.
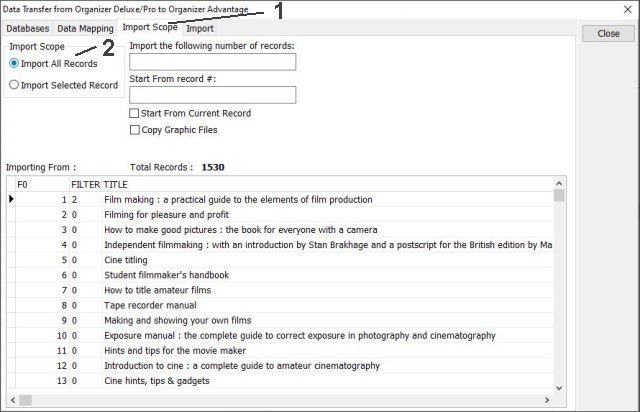
Import Scope
Click Import Scope (1). Next, use Import All Records (2). Finally, verify the number of records displayed in
the Importing From section.
You can use Import Selected Records option and define a subset of records to be imported. You can also do the cleaning of data later in Advantage, and it will be easier to execute.
If you have your image files in the ../DATA/GRPHIC folder click Copy Graphic Files. The transfer will copy your image files to the Advantage's corresponding image folder (../data/db/img/).
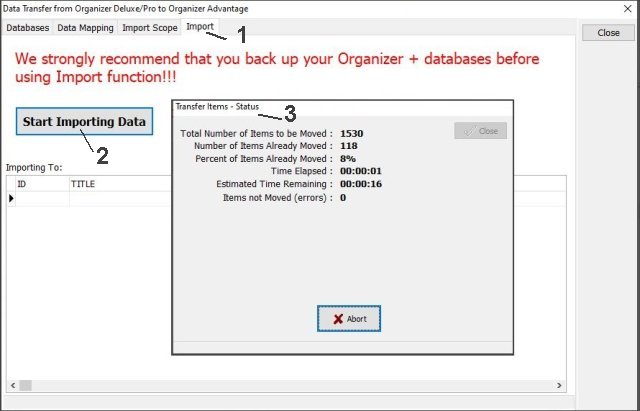
Import Data
Click Import (1) and click Start Importing Data (2). Review information displayed
in the Transfer Status(3) window.
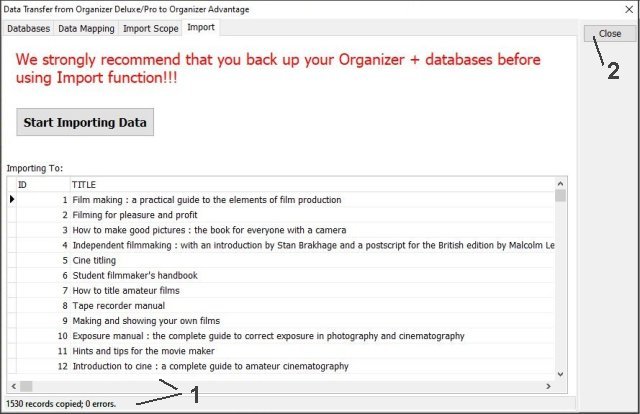
Review the import summary (1) and click Close (2) to close Transfer application.
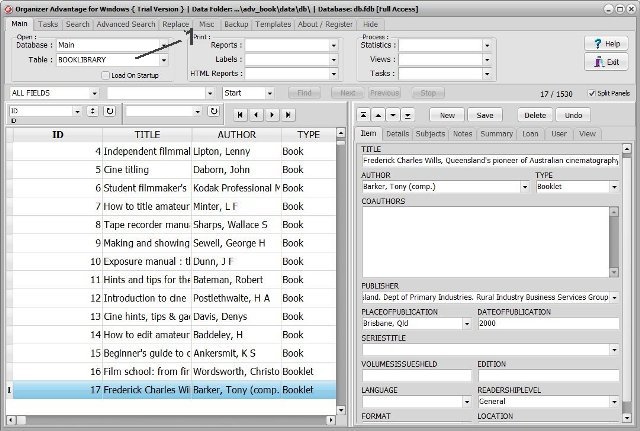
9. Advantage, review the final result
Start Advantage. Select the table (1) and review you data.
If something goes wrong, you can delete the table and repeat the whole procedure. Or, you can delete the data and repeat the data transfer.
Copyright © 2024 · All Rights Reserved · PrimaSoft PC