Question/Topic: Check in/out inventory system, how to start?
Step 1:
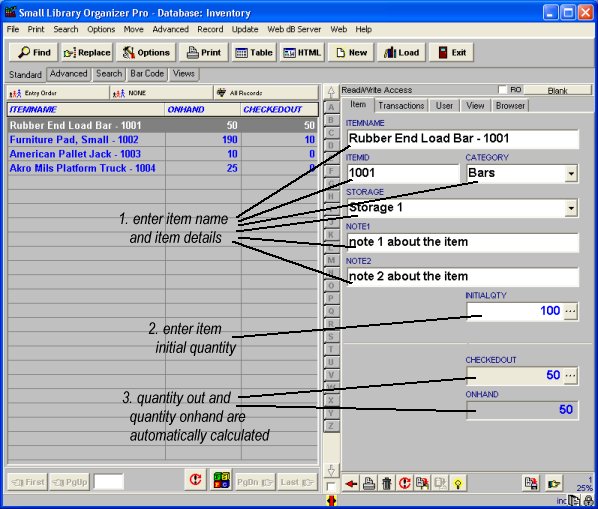
Enter your items into INVENTORY database.
- Names of all fields explain to you what type of information you are supposed to enter.
- Enter item initial quanity into INITIALQTY field.
- Use "userfields" for your specific data entry requirements.
Requirements:
-
You have to enter only the ITEMNAME and INITITIAL QUANTITY values to process your check in and check out transactions.
- The ITEMNAME field has to contain the unique value.
(step 1) Enter inventory items:
Step 2:
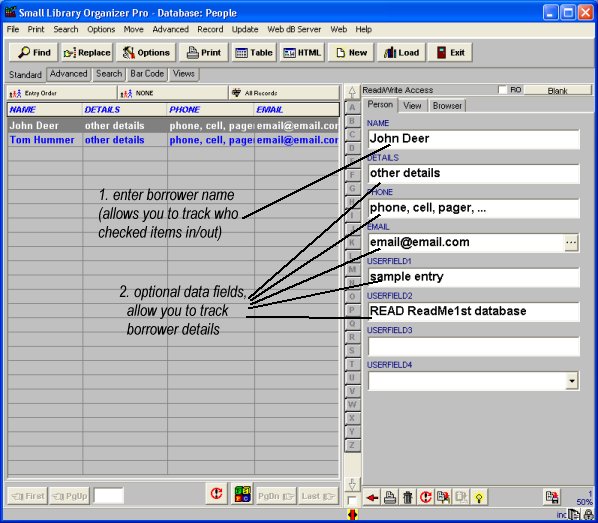
Enter borrowers into PEOPLE database.
- Enter borrower name and borrower details into PEOPLE database.
Requirements:
-
You have to enter only the Person Name.
- The Person Name field has to contain the unique value.
(step 2) Enter your incoming transactions (transaction general information and incoming items data)
Step 3:
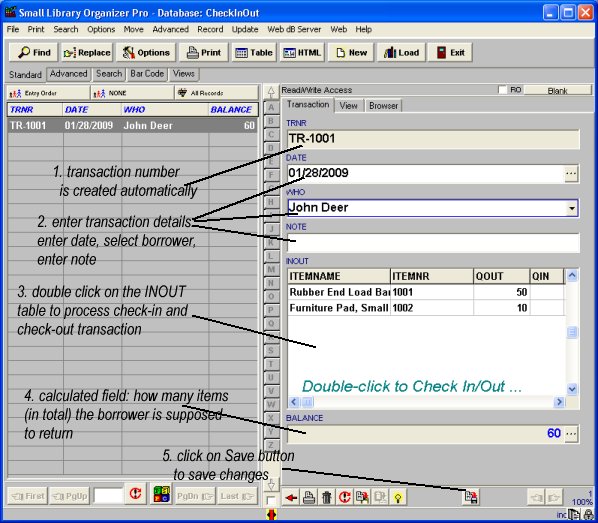
Enter general information about check-out transaction into CheckInOut database.
- Transaction number is created automatically.
- Enter transaction date and select the borrower from the WHO list (People database).
- Double click on the INOUT field/table to enter outgoing/incoming items (step 4).
(step 3) Enter your check-out/check-in transactions
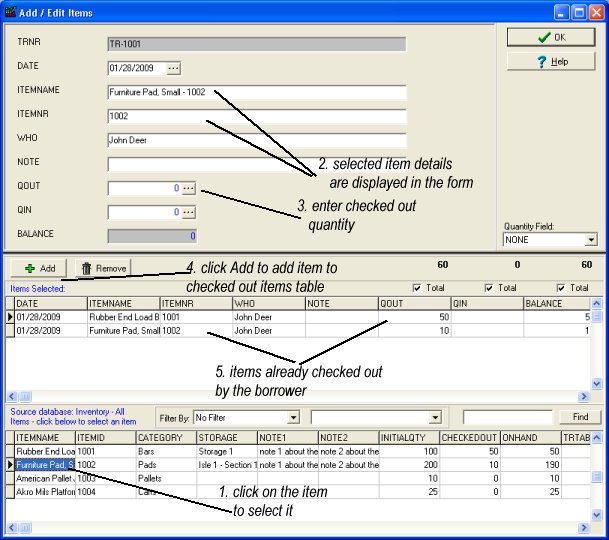
Step 4:
Enter item(s) check-out transactions.
- Select item in the ITEMS table (1.)(this table lists all items from INVENTORY database). If you have a long list of items you can use filter functionality to display only group of items. You can also use Find feature to find the item; example: you can scan item ID number with your barcode reader and click FIND.
- Selected item is displayed in the form (2.). Check if you selected correct item
- Enter outgoing quantity into QTYOUT field (3.).
- Click Add button (4.) to add the outgoing item transaction.
- Add another item to the outgoing (checked-out) items table.
- Click OK to save the whole transaction.
(step 3) checking out items transaction window:
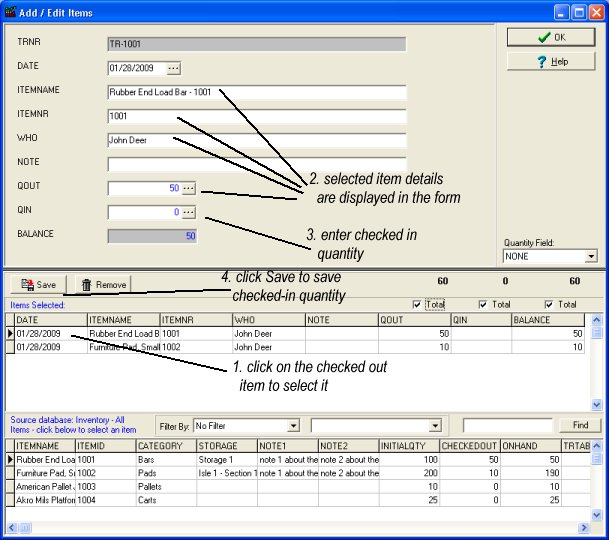
Step 5:
Enter item(s) check-in transactions.
- Select item in the Items Selected table (1.)(checked out items table).
- Selected item is displayed in the form (2.). Check if you selected correct item
- Enter incoming quantity into QTYIN field (3.).
- Click Save button (4.) to save the checked-in quantity.
- Click OK to save the whole transaction.
(step 5) checking in items transaction window: