| Organizer Advantage HowTo/Help | Designer HowTo/Help |
Designer Help > Build Database Simple > Home Inventory > Define Layout
easy-to-use database manager and database designer for Windows
- Designer Advantage
- Database, Table Panel
- Layout Panel
- Data Fields, Controls
- Database Templates (Free)
-
Build Database, Samples
> Home Inventory
- Create Table
> Define Layout
- Process Data
- List box, populate data
- Define, Calculate Tax
- Initialize Data
- Calculate Total Cost
- Calculate Anniversaries
- Build Database Advanced
- How To, More
Now you are ready to design data entry/view pages
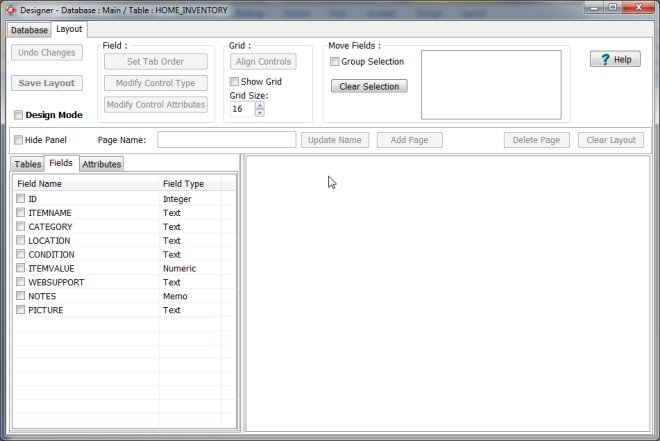
After creating a table you have to design data entry and view forms. The layout section of the Designer allows you to: choose the data entry control type for the selected data field, insert the data entry controls on one or many data pages, define the position of the data entry controls, and define attributes for the data entry controls.
- Click on the Layout tab. The Fields section displays all of your created data fields.
- The fields will be unchecked initially.
- To turn on all the design functions and to record the changes click on the Design Mode.
- This is optional.
- You can click on the ID field and include it on the form.
- This field is created automatically by the program. The application generates unique record numbers and stores them in this field.
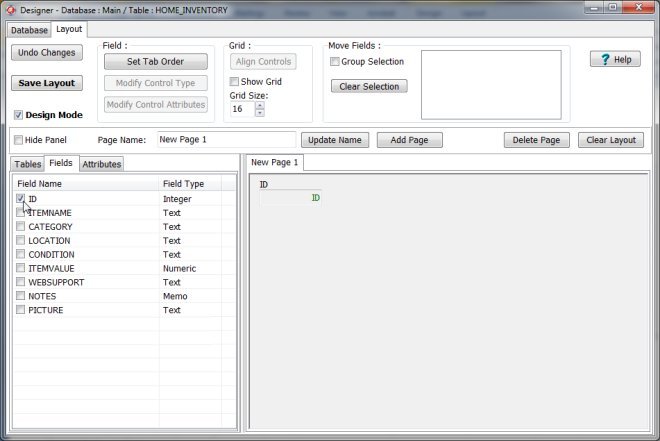
- Next you should select the data entry control for each of the fields.
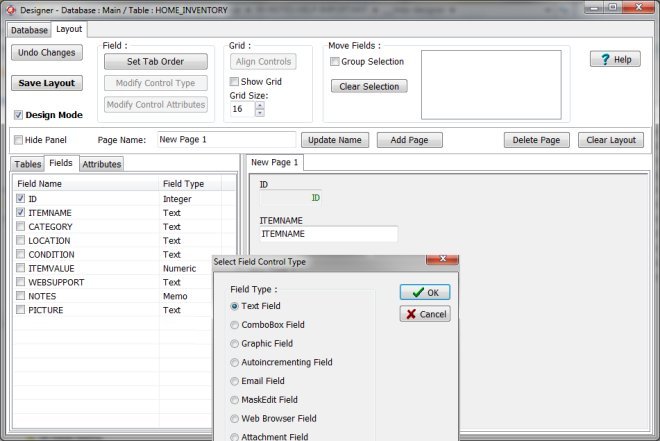
- Do this by clicking on a check box in front of the Field name.
- This will automatically open a screen with different types of Data Entry Controls.
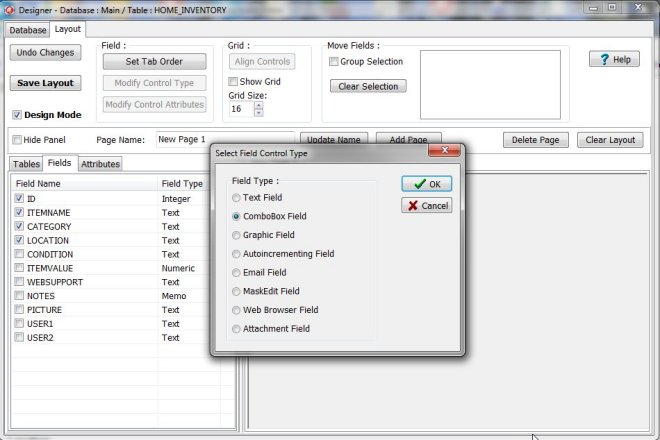
- Select the Data Entry Control as in the printed table that was created in the previous topic.
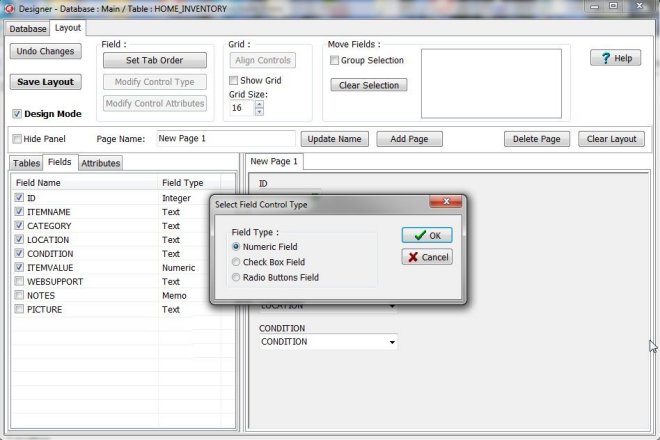
- For CATEGORY, LOCATION, and CONDITION select Combo-Box.
- For ITEMVALUE select Numerical.
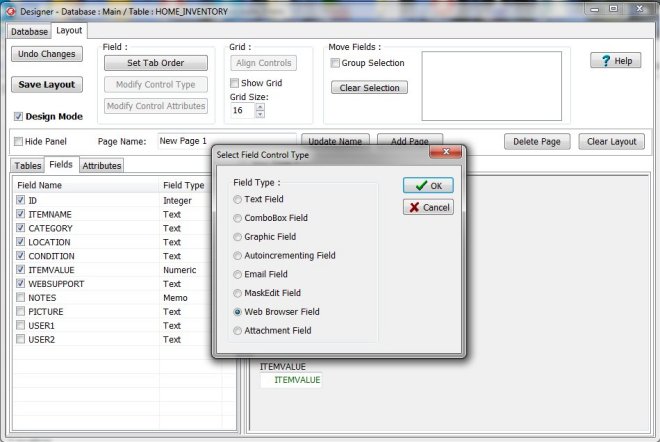
- For WEBSUPPORT select Web Browser.
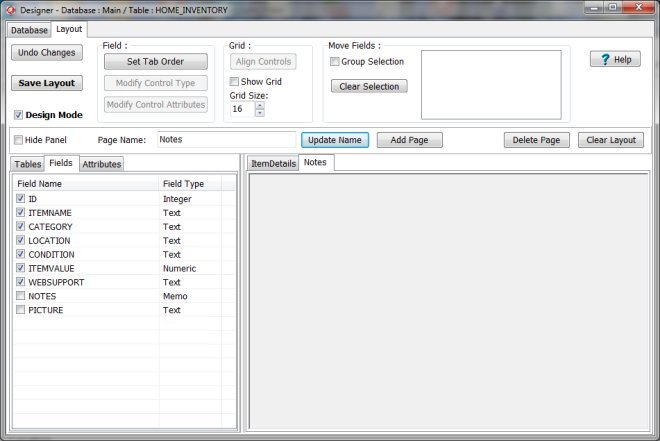
- We would like to have the NOTES field on a separate data page.
- In order to do that click on the Add Page button.
- A new data entry page is created with the Part 2 title.
- Enter Notes into the Page Name box and click the Update Page button to save it.
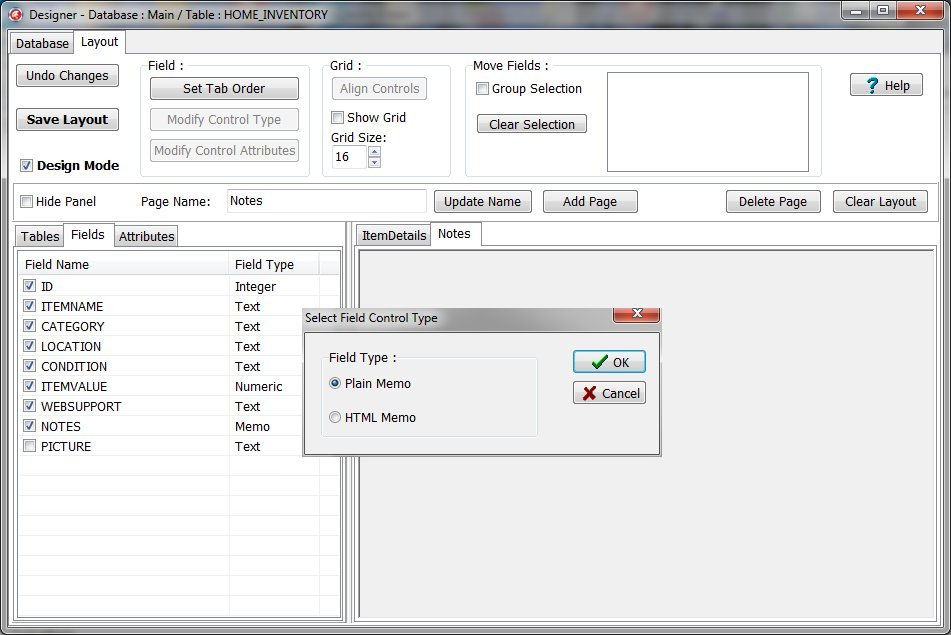
- Select the NOTES field and choose Plain Memo.
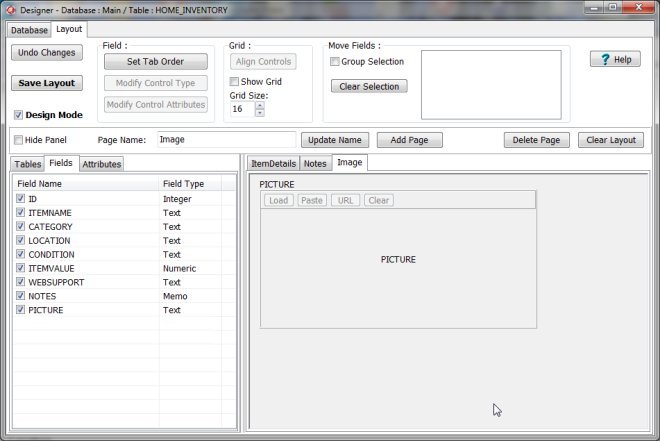
- Repeat the last instructions with the PICTURE data field.
- Create the new page with the Image name, insert the PICTURE and select GRAPHIC.
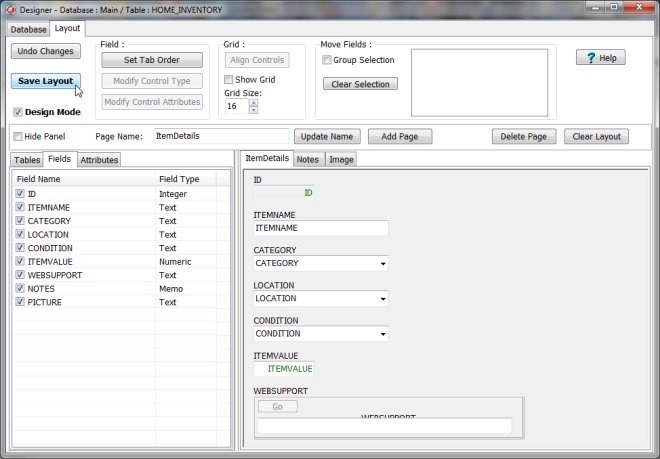
- You are now almost done. All data fields are placed on three pages.
- You can click Save Layout to save all the changes you have done up to now.
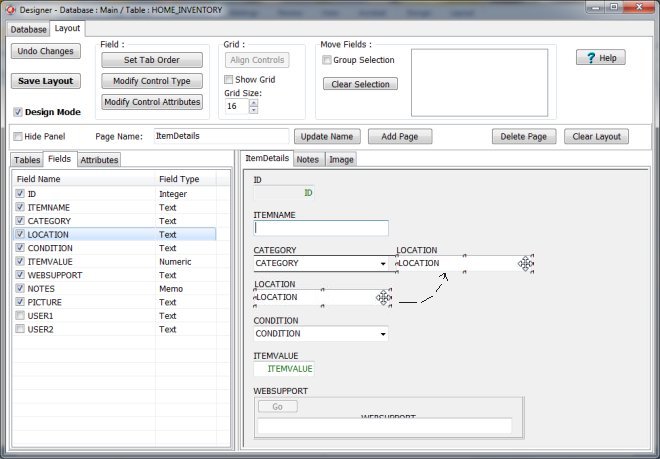
- You also have other options, that is, whether you would like to change the position of controls or modify some attributes for the selected controls.
- Click on the Design Mode again.
- To change the position of the control click on it, hold the mouse, move the control to a new position, release the mouse button.
- The final Item Details page will look like this.
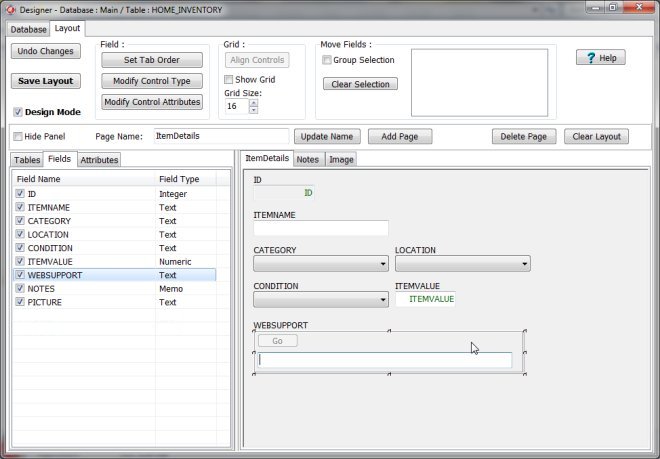
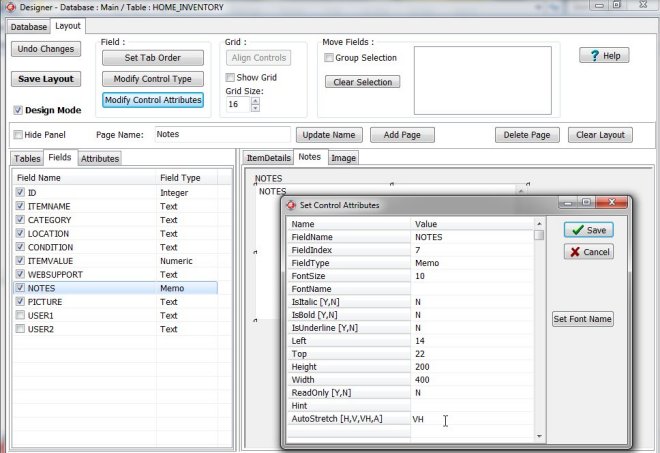
- For the Notes and Picture data controls we will set the auto stretch attributes, so the control box will adjust to the page size.
- We want the control to stretch in both directions, in this case set the option to VH, it means it will stretch vertically and horizontally.
- NOTE: the auto-stretching option is not active in Designer; the resizing is active in the Organizer Advantage application.
- Now press Save Layout and your template is done!
- Close Designer start Organizer Advantage.
Organizer Advantage, Simple Database Solutions for Windows PC
Organizer Advantage, Business Database Solutions for Windows PC
Copyright © 2025 · All Rights Reserved · PrimaSoft PC