- Administrator
- Add data
- Add data, import
- Inventory
- Maintenance
- Calibration
- Circulations
- Manage circulations
-
Print labels
- Print barcode labels
- Print labels for new items - Print reports
- Borrowers
- Fines
- Reservations
- Installation
- Options
- Databases
- Backup, Miscellaneous
- Supplies
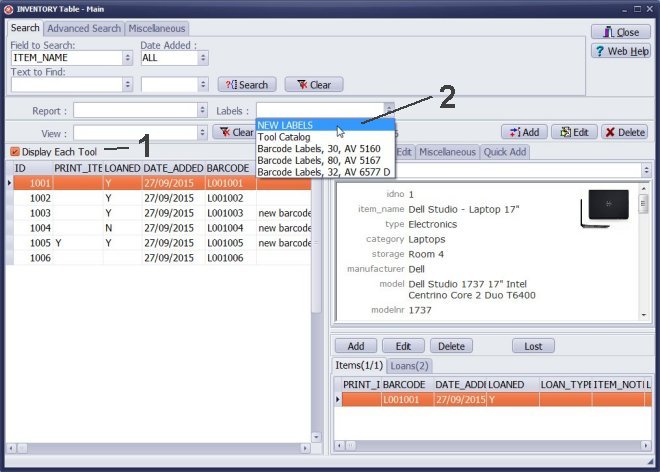
- In the Main Inventory window click Display Each Tool.
- Click on the Labels box and select New Labels.
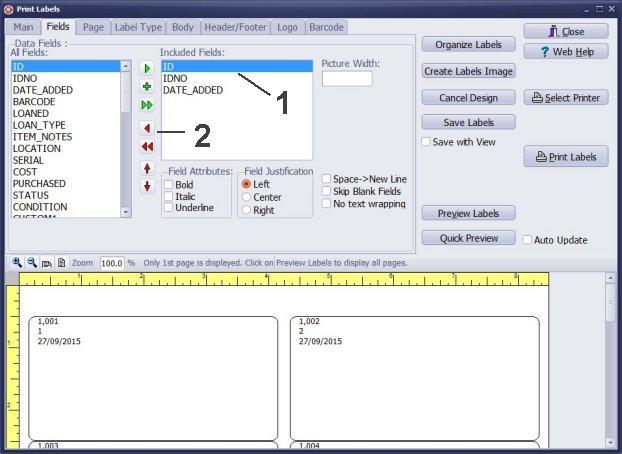
Select data fields that will be included on the label.
The Print Labels window always starts with 3 preselected data fields. Usually you will unselect them.
- Click on the field in the Included Fields box to select the field.
- Click Red Arrow icon to remove the field.
- Remove ID and IDNO fields from the Included Fields box.
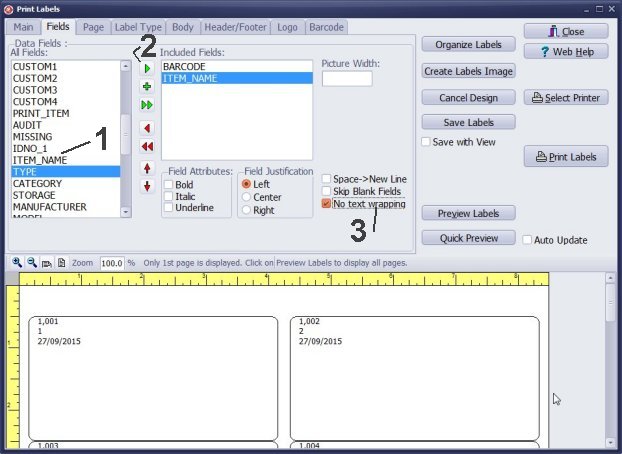
In this sample we want to create a label that includes a barcode and a tool/equipment name.
- Scroll down in the All Fields box, find ITEM_NAME field, then click ITEM_NAME to select it.
- Click the Green Arrow icon to include the ITEM_NAME in the Included Fields box.
- Select No Text Wrapping.
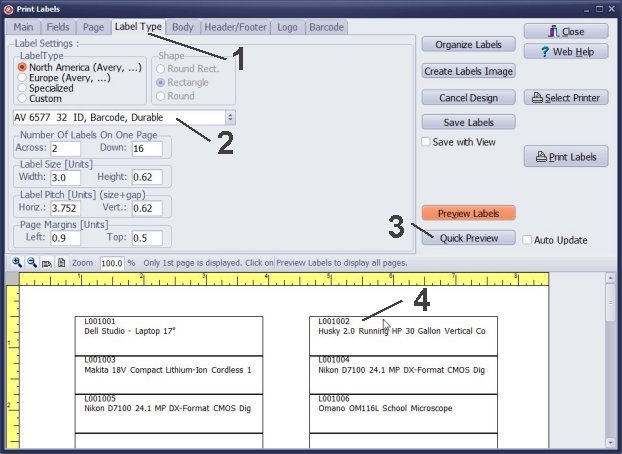
Select label type.
- Click the Label Type tab.
- Click on the Label Type box, scroll down, select "AV 6577 32 ID, Barcode, Durable".
- Click Quick Preview to verify the label type selected.
- The quick preview displays BARCODE field in the text form.
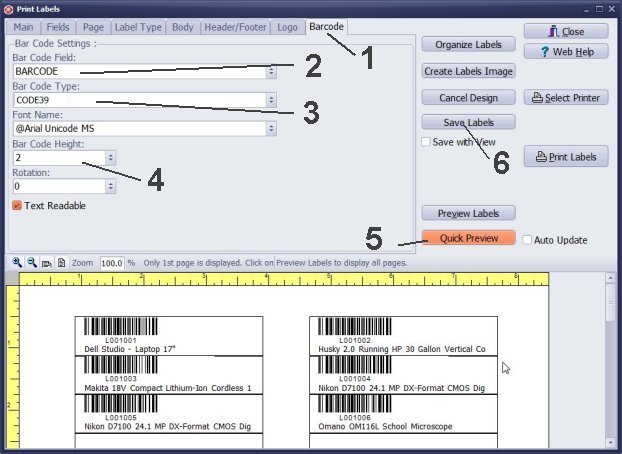
Define barcode.
- Click the Barcode tab.
- Select BARCODE in the Bar Code Field box.
- Select CODE39 in the Bar Code Type box. This barcode type is very popular for inventory check in/out applications. It can be decoded by virtually any barcode scanner/reader. The barcode is also self-checking.
- Select Bar Code Height.
- Click Quick Preview.
- Click Save Labels to save the label design for the future use.
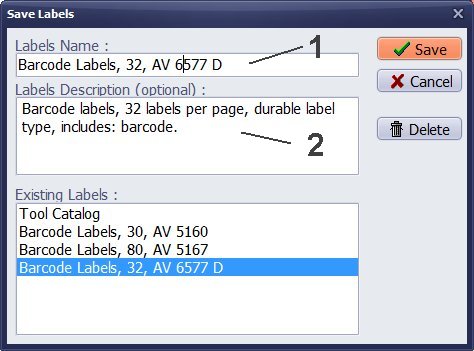
Save label design for the future use.
- Enter name into the Labels Name box.
- Enter label description into the Labels Description box.
- Click Save.

In the Print Labels window click Preview All.
- Use arrow icons to verify labels.
- Check the number of pages.
- Click Print icon to print.
- Click Close icon to close the Report Preview window.
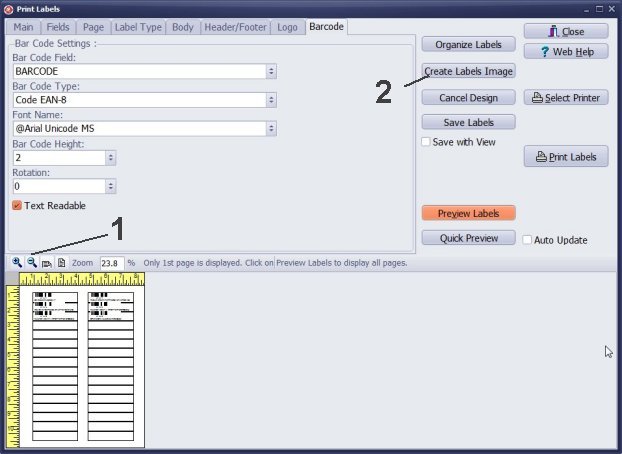
How to create a report image for the predefined template.
- Use Magnifying Glass icon to set the report preview size. Try to scale to 30% of the regular size.
- Click Create Labels Image.
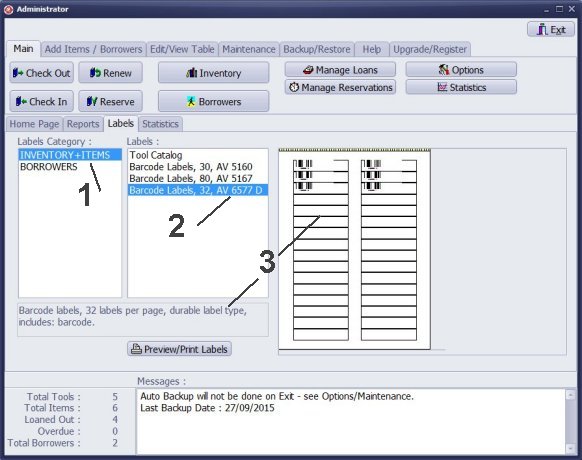
All saved reports and labels you can find on the Reports and Labels tabs.
- On the Label tab, in the Labels Category, click INVENTORY + ITEMS.
- In the Labels list click on the predefined label report.
- The selected label report displays the report description and preview .
- Double click on the label name or click Preview/Print Labels to run the report.
We offer Handy Equipment-Tool Manager Windows application for tool/equipment rental facility that provides the same label printing functionality. In addition, you can find more how-to and sample topics in the Handy Equipment/Tool Manager- Print Labels help section.
Latest calibration management articles:
Handy Calibration Manager for Windows:
Handy Calibration Manager
software tour
software features
download, try now
buy now
upgrade software
upgrade license
Equpiment, tool tracking software solutions:
- office inventory tracking with check in/out
- equipment tracking, tool crib tracking with check in/out
- av, media equipment with check in/out
- police equipment
- prison, equipment tracking with check in/out
- athletic, sport equipment tracking review
- calibration management software
Copyright © 2024 · All Rights Reserved · PrimaSoft PC