Organizer Advantage is powerful yet easy to use database manager for Windows.
Advantage Designer lets you modify our solutions or easily create new databases.
Take control of your data with our simple or buinsess database software solutions.
| Organizer Advantage HowTo/Help | Designer HowTo/Help |
Advantage Help > Add-Ons > Transfer > Transfer, Method 2
- Organizer Advantage
- Getting Started Videos
- Main Window
- Tabbed Toolbars
- Add Data
- No Limits
- Reports
- Labels
- Search, Replace
- HTML Reports
- HTML Wizard
- Import, Export
- Free Data Setup
- Backup, Restore
- Options
- Statistics, Views
- Solutions
- Templates
- Add-Ons
- Access Add-Ons
- Viewer
- Search
- Designer
> Transfer
- Method 1
> Method 2
- Layout Scale
- How To .. - Install, Network
- Web Search, Add Data
- Premium
- Upgrade, Update
- Organizer Deluxe, Pro Users
- More
Transfer Data from DLX Pro into Advantage – Part 2
This page continues the process of importing and organizing DLX Pro data within the Organizer Advantage program.
Install Organizer Advantage with a similar solution. Review the data template and all data fields. Can you move all data from Deluxe or Pro solution into Advantage? If yes, do the following:
- Start Transfer application
- Select deluxe or pro Data folder, select source table
- Select advantage db folder, select destination table
- Define data field mapping
- Transfer data from source table into destination table
Method 2: How to transfer data from Deluxe/Pro into Advantage:
Install Organizer Advantage
Download, install, and review Organizer Advantage:
Advantage Simple,
Advantage Business
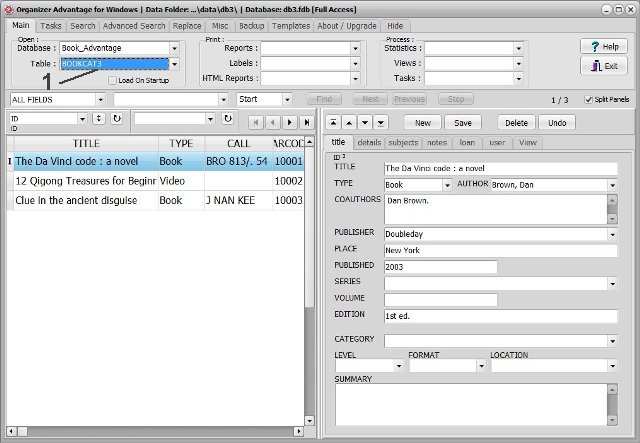
Look for a solution that is similar to your Deluxe or Pro. In this sample Book Organizer Advantage is installed. It offers three book inventory tables (1) to choose from.
Start Transfer application.
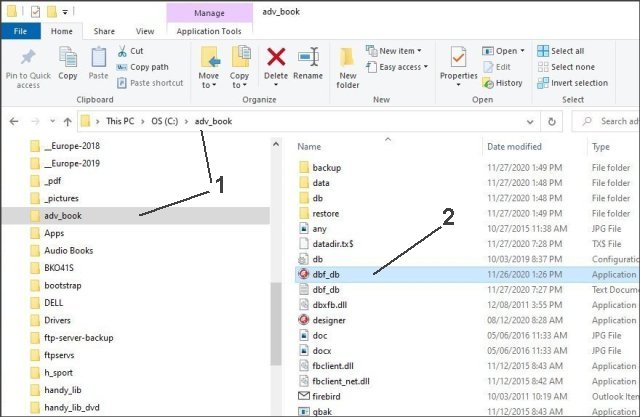
To start Transfer application open Windows File Explorer, select Organizer Advantage (1) folder,
and double click on the dbf_db.exe (2) to start (transfer application).
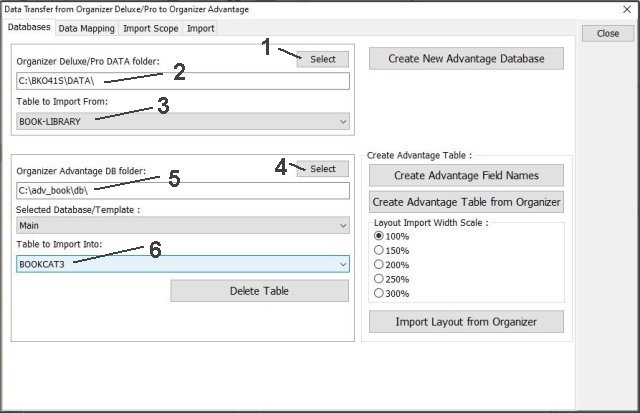
Select Data folder
Click Select (1) and go to the Deluxe or Pro installation folder and select DATA (2) folder.
In the Table to Import From (3) box select the table that you would like to transfer into Advantage.
In this sample BOOK-LIBRARY is selected.
Select db folder
When you start Transfer procedure this folder could be already pre-selected.
If the folder is not selected click Select (4) and go to the Advantage installation
folder and select db (5) folder. In the Table to Import Into (6) box select the destination table.
In this sample BOOKCAT3 is selected.
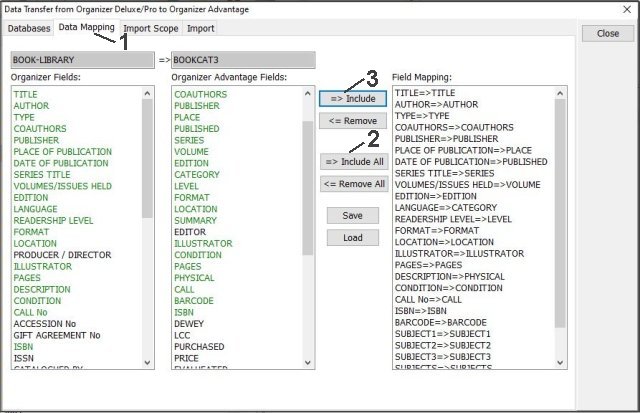
Data Mapping
Click Data Mapping (1) and define the mapping: match fields from the source and the destination tables.
Click Include All (2) to create the field mapping list with fields that use the same names in both tables.
Select mapping pairs for remaining fields, in this case select the pair and click Include (3).
Green: means the mapping pair is selected and listed in the Mapping box.
Black: the mapping is not defined.
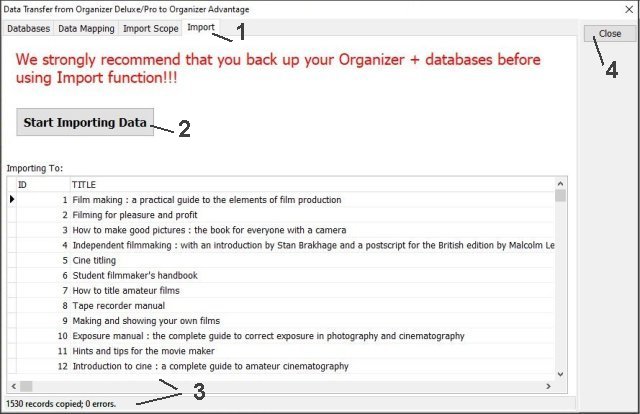
Import Data
Click Import (1) and click Start Importing Data (2). Review the import summary (2)
and click Close (3) to close Transfer application.
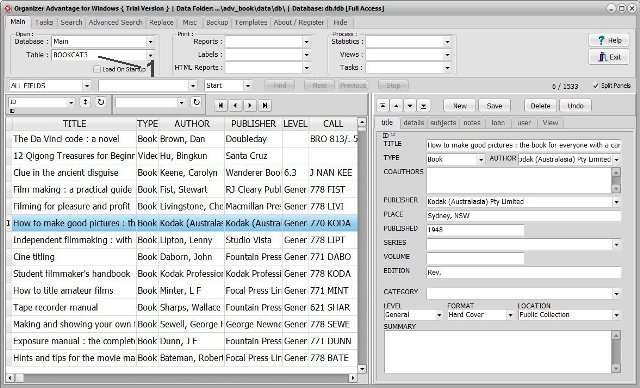
Advantage, review the final result
Start Advantage. Select the table (1) and review your data.
Copyright © 2026 · All Rights Reserved · PrimaSoft PC