Help, how to topics > Library items > Library main catalog.
-
Library Items
> main catalog
- new items table
- old/lost items table
- item fields, things to know
- sorting
- library grid
- search, advanced search
- barcode search, print label
- letter bar
- items catalogued today
- advanced search, sql
- searching, replacing
- search, sql commands
- view book, view tab
- maximum number
- delete library item
- lost, missing items
Library main catalog.
The Library Main catalog gives you quick access to all your library items. You can review information about your items, add and edit data, print spine or barcode labels, print catalog cards, or define and run library reports.
Library Catalog offers two view modes. When you learn the system, use Display Each Copy mode. It gives you access to all data fields (item and copy), all predefined reports and labels, full search, and more.
The Add feature supports manual data entry or auto-cataloging by ISBN. Use this command when you plan to enter a small number of items. To process bulk data entry, try to use the Library New Items table.

- The Library window opens with the complete list of all items.
- There is always one item selected in the table. The item's details are displayed in the View panel.
- An item's copies are listed in the Copies panel. Each item has at least one copy.
- Navigation buttons allow you to move from item to item.
- The Number indicator tells you what item is selected out of the total number of displayed items.
- Click the Search tab to execute a simple search.
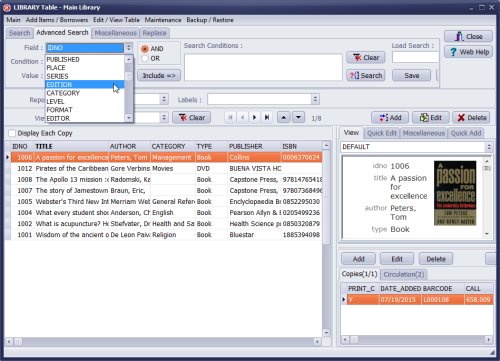
- Click the Advanced Search tab to run an advanced search and save it as a View.
- Click the Replace tab to process a global replace.
- Execute delete, export, and update commands.
- Define new or run predefined library reports.
- Define new or print predefined labels.
- In the View, load saved advanced search (view).
- Use the letter bar to display the section where records start with the selected letter.
- Use a right mouse click on the grid header to access the grid's various commands.
- Scan a barcode label, and the program automatically selects the item. (new in version 4.0)
Library Catalog offers two view modes. When you learn the system, use Display Each Copy mode. It gives you access to all data fields (item and copy), all predefined reports and labels, full search, and more.
Items View Mode
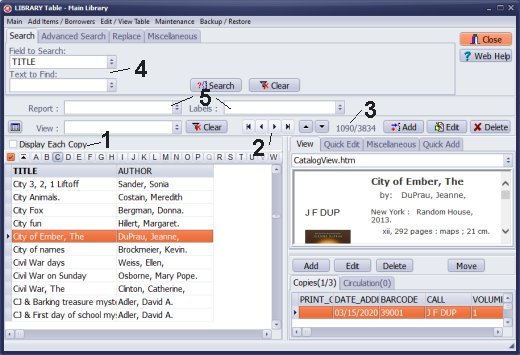
You are in Items View mode, Display Each Copy is Off (1).
-
To list only items, uncheck Display Each Copy (1).
NOTE: In this mode, you do not have access to copy data fields on the grid, search, reports, and labels. - Navigation buttons allow you to move from item to item.
- The Number indicator tells you what item is selected out of the total number of displayed items (1090/3834).
- Click the Search tab to execute a simple search (you do not have access to copy data fields: BARCODE, CALL, DATE_ADDED).
- Click Report or Labels. You have access to reports and labels that use only item data fields.
Copies View Mode (USE THIS MODE)
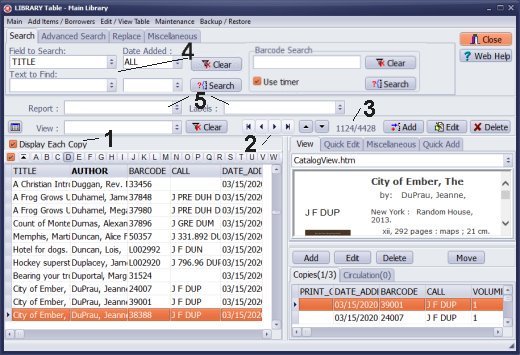
You are in Copies View mode, Display Each Copy is On (1).
-
To list all copies, check the Display Each Copy (1).
NOTE: In the Display Each Copy mode, you have access to item copy data fields on the grid, search, reports, and labels (CALL, BARCODE, DATE_ADDED). - Navigation buttons allow you to move from copy to copy (2).
- The Number indicator tells you what copy is selected out of the total number of displayed copies (1124/4428).
-
Click the Search tab to execute a simple search (some copy fields are included in the Field to Search box, Date Added search is activated).
- Click Report or Labels. You have access to reports and labels that use item data and copy data fields.
Items View Mode
Copies View Mode
Items View, Search:
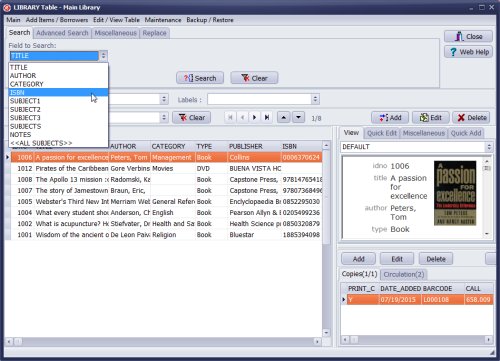
Field to Search: allows you to select only some fields from the item data.
Copies View, Search:
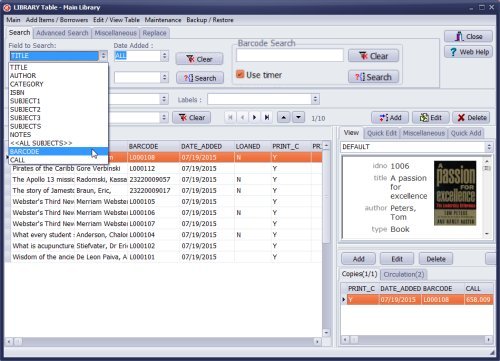
Field to Search: allows you to select fields from the item data as well as some fields from the copy data (CALL, BARCODE).
Items View, Advanced Search:
Field: allows you to access all data fields from the item data.
Copyies View, Advanced Search:
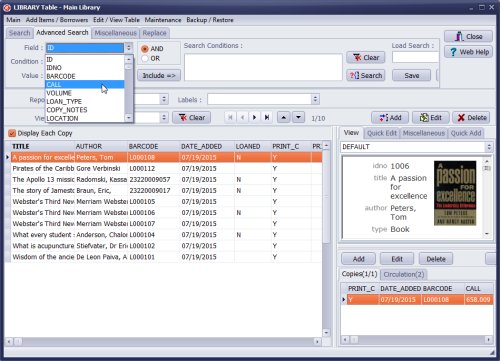
Field: allows you to access all data fields from the item data as well as the copy data. Date Added search is activated.
Items View, print Reports:
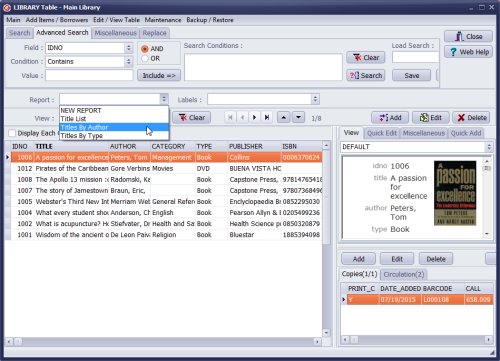
You can define new reports with data fields from the item data. The report box lists all predefined reports that were created in the Items View mode.
Copies View, print Reports:
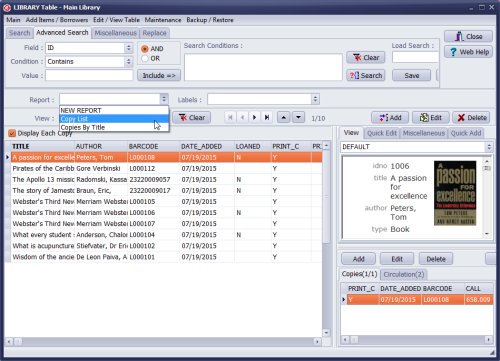
You can define new reports with data fields from the item and copy data. The report box lists all predefined reports that were created in the Copies View mode.
Items View, print Labels:

You can define new label reports with data fields from the item data. The Labels box lists all predefined reports that were created in the Items View mode.
Copies View, print Labels:
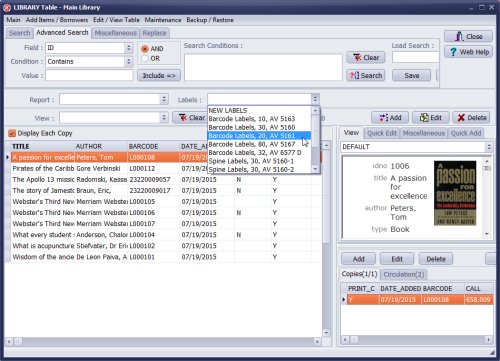
You can define new label reports with data fields from the item and copy data. The Labels box lists all predefined reports that were created in the Copies View mode. For example all predefined barcode and spine labels use BARCODE or CALL data fields from the copy data. They are accessible in the copies view mode.
Items View, the grid:
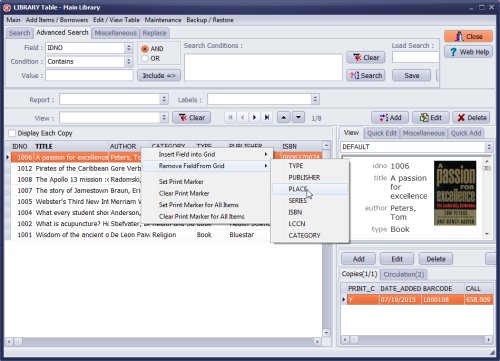
Insert and display any data field from the item data.
Copies View, the grid:
Insert and display any data field from the item and copy data.
Question:
How do I add BARCODE data field to the list of data fields when trying to design my barcode labels?
Answer: You should select "copies view mode".
Question:
We have a predefined label for our school library(which you set up for us). When
I try to print labels, I cannot always find a list of predefined labels, including ours.
Answer: You should select "copies view mode". Barcode labels are defined with
the "copies view mode" on, and they are displayed when this mode is on.
Question: I am trying to print barcode labels for recently added items but there is no date-added field in advanced search.
Answer: Check the view mode. The library catalog window has to be in the Copies View Model. In this case, all main item data fields and the selected copy data fields are in the Field box, including DATE_ADDED. How to use the advanced search?
Question: I am trying to print some barcode labels for some books I have recently added to our library. I have done this many times. However, this time on the "Print Labels" page when I click on Fields, "Barcode" is not an option for me to choose, so no barcodes will populate. What am I missing?
Answer: Turn on the "Display Each Copy" option. When this option is on, you will have access to all fields in the copy description section (barcode, call number, date added).
Handy Library Manager 4.3, review new features
Labels Printing Software for Windows
Library Web Search, review new web search
Library Search 4.0, review new desktop search
Getting started library video lessons
How to include library name on labels
Library, Data Entry Form Designer
Edit item or borrower data in the check-in/check-out window?
Link item lost fine with the PRICE data field?
Handy v3.2 supports letter tabs?
How to predefine library email messages?
How to update library data from the web with ISBN?
How to predefine library email messages?
Compilation of questions and answers from library requests will help you to make purchase decision.
How to verify if the item is checked out in the library main catalog window?
How to create a new record using Copy Selected Item?
Special Library, how to manage digital and paper document library?
What is the maximum number of library items?
Library Software for Small Libraries, Windows application
Handy Library Manager
small library software
library tour
library features
try now, download
cloud
library software reviews
Copyright © 2024 · All Rights Reserved · PrimaSoft PC