.. > Equipment, Print Labels > Print barcode label,define barcode label report
How to define new equipment tracking barcode label?
In this topic you will learn how to select equipment data fields to be included on the label, how to choose label type, how to select bar code type, and how to set label layout parameters.
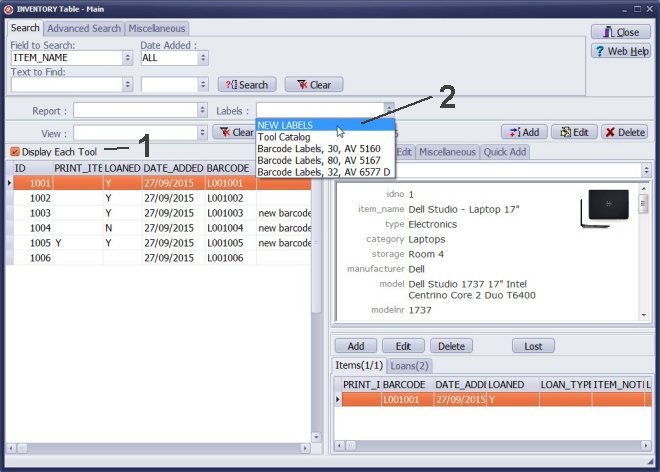
- In the Main Inventory window click Display Each Tool.
- Click on the Labels box and select New Labels.
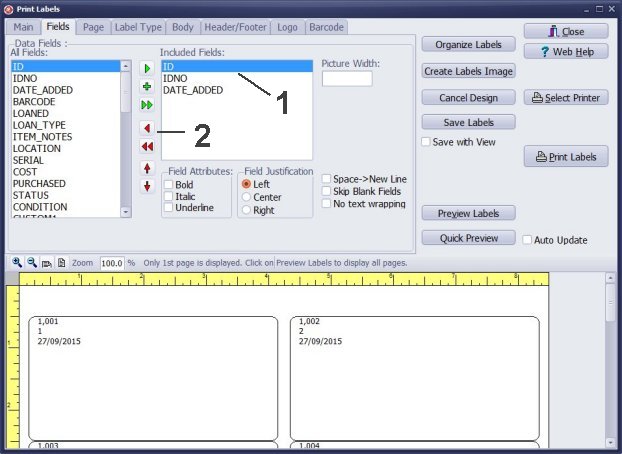
Select data fields that will be included on the label.
The Print Labels window always starts with 3 preselected data fields. Usually you will unselect them.
- Click on the field in the Included Fields box to select the field.
- Click Red Arrow icon to remove the field.
- Remove ID and IDNO fields from the Included Fields box.
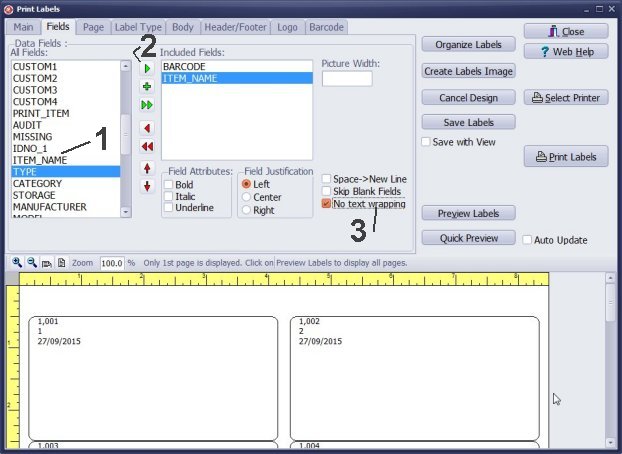
In this sample we want to create a label that includes a barcode and a tool/equipment name.
- Scroll down in the All Fields box, find ITEM_NAME field, then click ITEM_NAME to select it.
- Click the Green Arrow icon to include the ITEM_NAME in the Included Fields box.
- Select No Text Wrapping.
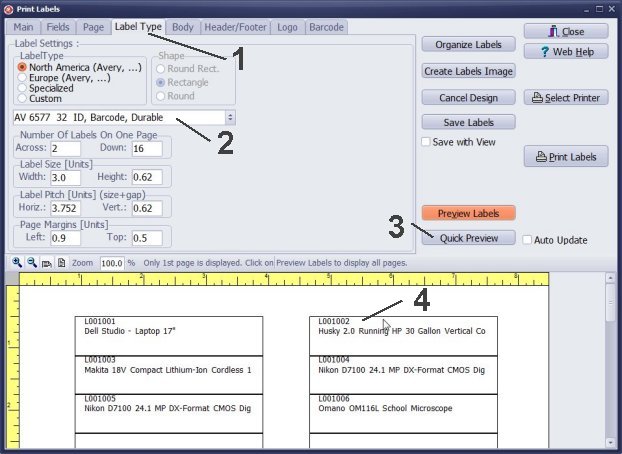
Select label type.
- Click the Label Type tab.
- Click on the Label Type box, scroll down, select "AV 6577 32 ID, Barcode, Durable".
- Click Quick Preview to verify the label type selected.
- The quick preview displays BARCODE field in the text form.
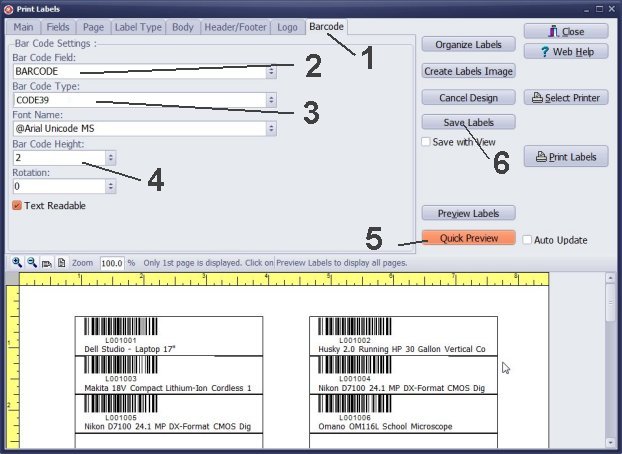
Define barcode.
- Click the Barcode tab.
- Select BARCODE in the Bar Code Field box.
- Select CODE39 in the Bar Code Type box. This barcode type is very popular for inventory check in/out applications. It can be decoded by virtually any barcode scanner/reader. The barcode is also self-checking.
- Select Bar Code Height.
- Click Quick Preview.
- Click Save Labels to save the label design for the future use.
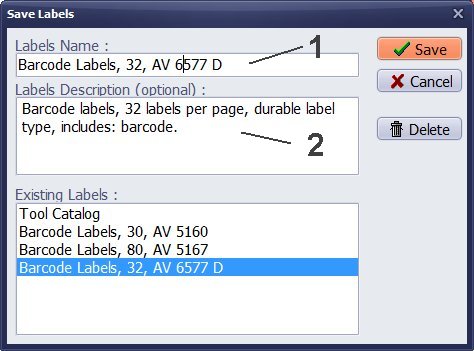
Save label design for the future use.
- Enter name into the Labels Name box.
- Enter label description into the Labels Description box.
- Click Save.
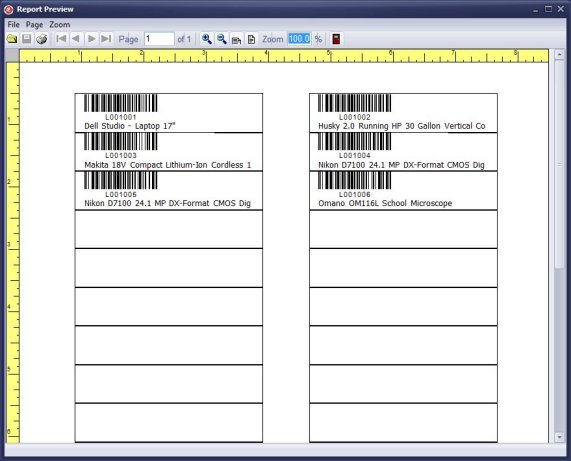
In the Print Labels window click Preview All.
- Use arrow icons to verify labels.
- Check the number of pages.
- Click Print icon to print.
- Click Close icon to close the Report Preview window.
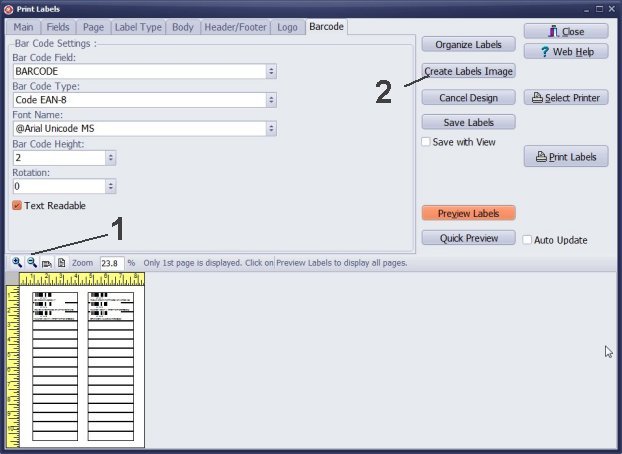
How to create a report image for the predefined template.
- Use Magnifying Glass icon to set the report preview size. Try to scale to 30% of the regular size.
- Click Create Labels Image.
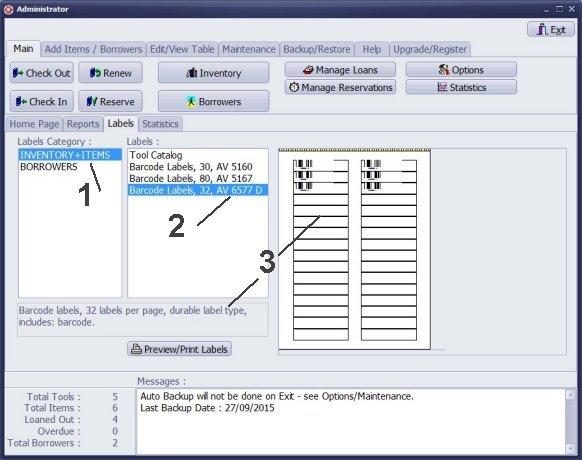
All saved reports and labels you can find on the Reports and Labels tabs.
- On the Label tab, in the Labels Category, click INVENTORY + ITEMS.
- In the Labels list click on the predefined label report.
- The selected label report displays the report description and preview .
- Double click on the label name or click Preview/Print Labels to run the report.
We offer Handy Library Manager application for libraries that includes the same print labels functionality. In addition, you can find more how-to and sample topics in the Handy Library-Print Labels help section.
Latest equipment tracking how to articles:
How to email overdue notices to borrowers?
How to predefine email messages?
How to set automated emails with your Gmail account?
How to set automated emails with your Office365 account?
How to display checked out items in the equipment main inventory?
How to modify due dates for the checked out equipment?
Customized check-out receipt, include all items.
How to send email messages to all equipment users?
How to print group-by reports where each group starts on a new page?
How to export data from a custom view?
How to print, email check-out receipts?
How to modify the grid (number of columns, column size, column position)?
Handy Equipment Management with Check In/Out:
Handy Equipment-Tool Manager
tour
features
try now
cloud
Equpiment, tool tracking software solutions:
- office inventory tracking with check in/out
- equipment tracking, tool crib tracking with check in/out
- av, media equipment with check in/out
- police equipment
- prison, equipment tracking with check in/out
- athletic, sport equipment tracking review
- calibration management software
library software packages (included with handy e-t software):
school library
church library
non-profit org. library
business library
community library
small public library
Copyright © 2024 · All Rights Reserved · PrimaSoft PC