Help, how to topics > Reading program topics > How to print labels with reading program data?
How to Print Labels with Reading Program Data
This guide explains how to print labels that include: reading level, category, author, and title.
Key Topics Covered:
- How to utilize different label design features
- How to adjust font size, label margins, and field attributes
When designing your labels, consider how you organize your books on shelves or in boxes. Labels should assist librarians, volunteers, teachers, and students in returning books to their proper places. Additionally, book labels help students choose books based on their reading level and the content they are interested in.
- In the Library Main window click on the Labels box and select New Labels.
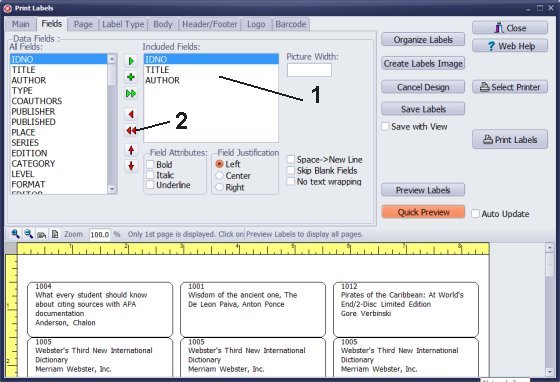
- The Print Labels Window opens with 3 preselected data fields (1). Click the double red arrow icon (2) to remove the preselected data fields.
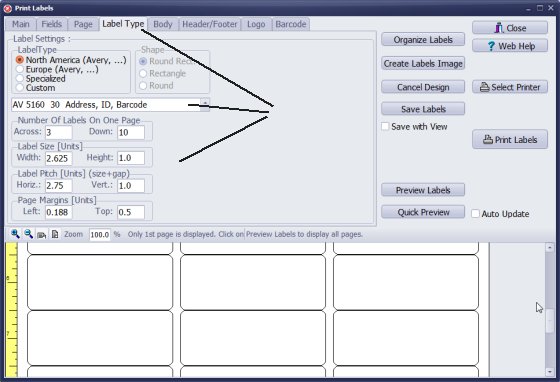
- Click Label Type, select Avery 5160 (3 labels across and 10 labels down).
- You are not limited to this type, you can select any predefined label. If the type you would like to use is not listed you can contact us, we will create a new label definition.
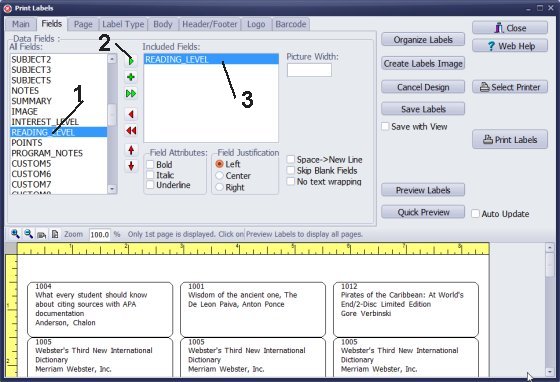
- Select data fields in the All Fields box (1). Click the single green arrow icon (2) to include the field in the Included Fields box (3).
- There are 4 data fields in the Included Fields, they will be printed in the following order: READING_LEVEL, CATEGORY, AUTHOR, TITLE.
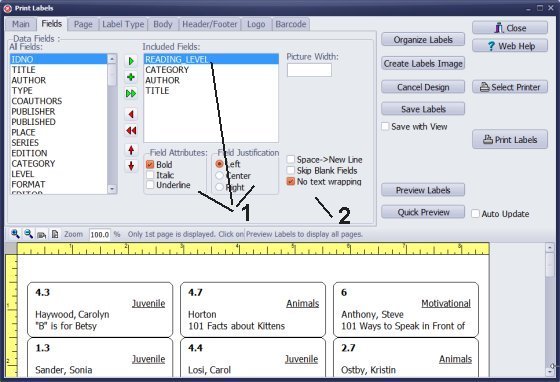
- The READING_LEVEL is selected, you can set the field option in the Field Attributes and Field Justification sections (1). (Bold fonts will be applied to READING_LEVEL).
- Global Field settings (2): options in this section will apply to all data fields. In this case No Text Wrapping is selected (long data values will be cut at the end of the label line, example: TITLES).
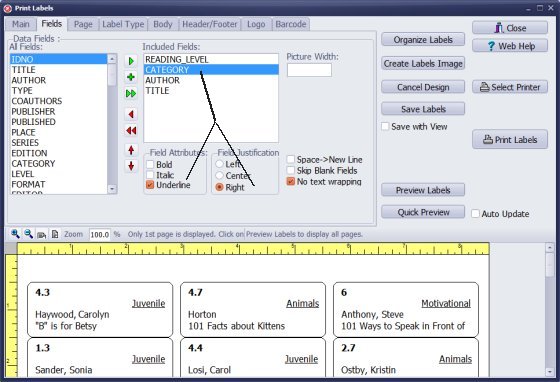
- CATEGORY field is selected. Underline and Right Justification will be applied to this field.
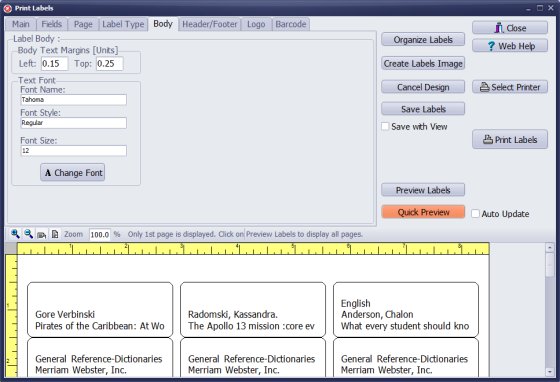
- Define the label body margins. Margins are symmetrical; it means that the left margin defines the right margin.
- The font type and size you can define on the Body page. Click the Change Font button. Select the font type and size.
- Click Preview Labels to display the label report preview.
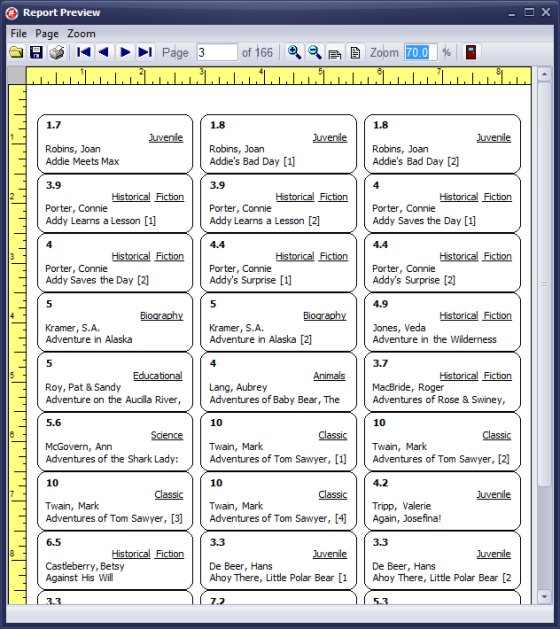
- Reading level displayed in the top left corner, category is underlined and is right justified followed by item's author and item's title that are left justified.
How do I print labels with the reading level, category, author, and title? How can I use different label design features? How do I set the font size, label margins, and field attributes?
Handy Library Manager 4.5, review new features
Inquiries from Librarians and Libraries
ISBN Book Finder And Cataloging Tool
Library Web Search, review new web search
How to print replacement labels?
Getting started library video lessons
How to include library name on labels
Library, Data Entry Form Designer
Edit item or borrower data in the check-in/check-out window?
Link item lost fine with the PRICE data field?
Handy v3.2 supports letter tabs?
How to predefine library email messages?
How to update library data from the web with ISBN?
How to predefine library email messages?
Compilation of questions and answers from library requests will help you to make purchase decision.
How to verify if the item is checked out in the library main catalog window?
How to create a new record using Copy Selected Item?
Special Library, how to manage digital and paper document library?
What is the maximum number of library items?
Library Software for Small Libraries, Windows application
Handy Library Manager
small library software
library tour
library features
try now, download
cloud
library software reviews
Copyright © 2026 · All Rights Reserved · PrimaSoft PC