Help, how to topics > Reading program topics > How to display items within the reading level range?
How to Display Items Within a Defined Reading Level Range
This topic covers the following:
1. How to display items that fall within a specified reading level range.
2. How to display items that have a specific reading level value.
Note: The library table referenced in this article is customized;
the standard data fields have been renamed to accommodate data entries
related to the reading program, including Reading Level, Reading Interest,
Quiz Points, and Reading Program Notes.
- rename data fields
How to display library items that have reading level between 2.0 and 3.0.
- Open the Main Library window.
- Click the Advanced Search tab.
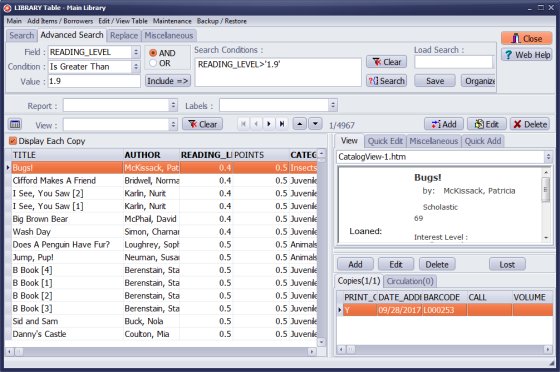
- Select Reading_Level in the Field box. Select Is Greater Than in the Condition box. Enter 1.9 value into Value box. Click Include. The condition is displayed in the Search Condition box.
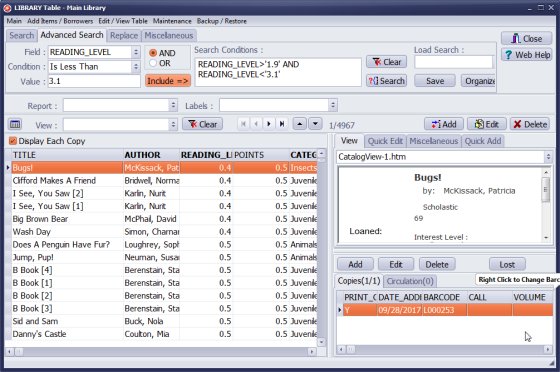
- Define new condition. In this case select Is Less Than in the condition box. Enter 3.1 value into the Value box. Click Include. The new condition is added in the Search Condition box.
- Click Search.
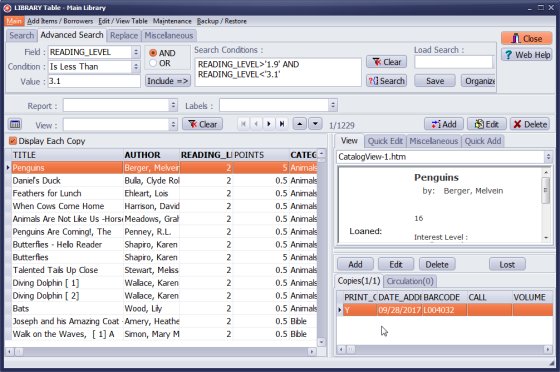
- The search is executed. Only items that have reading level value between 2.0 and 3.0 (high and low range values are included) are displayed (in this case there are 1129 items). If you print report or print labels only those records will be printed.
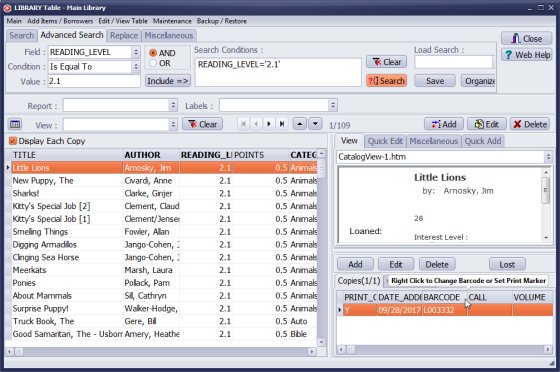
- This example shows how to display items with the Reading_Level equal 2.1. (in this case there are 109 items)
How can items be displayed within a specific reading level range? How can items be displayed using a specific reading level value?
Handy Library Manager 4.5, review new features
Inquiries from Librarians and Libraries
ISBN Book Finder And Cataloging Tool
Library Web Search, review new web search
How to print replacement labels?
Getting started library video lessons
How to include library name on labels
Library, Data Entry Form Designer
Edit item or borrower data in the check-in/check-out window?
Link item lost fine with the PRICE data field?
Handy v3.2 supports letter tabs?
How to predefine library email messages?
How to update library data from the web with ISBN?
How to predefine library email messages?
Compilation of questions and answers from library requests will help you to make purchase decision.
How to verify if the item is checked out in the library main catalog window?
How to create a new record using Copy Selected Item?
Special Library, how to manage digital and paper document library?
What is the maximum number of library items?
Library Software for Small Libraries, Windows application
Handy Library Manager
small library software
library tour
library features
try now, download
cloud
library software reviews
Copyright © 2026 · All Rights Reserved · PrimaSoft PC