Help, how to topics > Print labels. > Best Practices for Pre-Printing High-Quality Library Barcode Labels with Handy Library Manager
-
Print Labels
- barcode labels
- print new items only
- print recently added
- spine labels
- design spine label
- spine labels, samples
- print one spine label
- randomly select, print
- index/catalog card
- print from current
- define custom label
- print markers
- print to PDF
- set alignment, PDF files
- new label temlates
- page sizes, A4, Legal
- labels cross referernce
- spine labels, landscape
- library logo on labels
- design member id card, tag
- label suppliers
- spine labels, ready-to-use
- barcode labels, PDF files
> pre-print barcode labels
Best Practices for Pre-Printing High-Quality Library Barcode Labels with Handy Library Manager
Libraries use various methods to print barcode labels. Our system is designed to simplify this process: users can add new items, generate automated barcode numbers, and print barcode labels for those items. However, this process does not eliminate the need for pre-printed barcodes or for using existing labels.
The following instructions explain how to use Handy Library Manager for this purpose. Libraries can print multiple labels from the temporary records we provide. This service is available to users with a valid yearly support subscription.
To request the file that lets you print these labels, please send us an email with the following information:
- Licensed To: (You can find this information in the About window)
- Starting Barcode Number: 009000
- Number of Barcodes Needed: 1000, 100
We will respond with an attached text file.
After receiving the email, save the attached file to your computer and note the folder name where you saved it. The file will include the first row with the names of the data fields that define the import mapping, followed by the library name and the barcode records.
Instructions for Pre-Printing Barcode Labels Using Handy Library Manager
- Launch the Handy Library Manager on your computer.
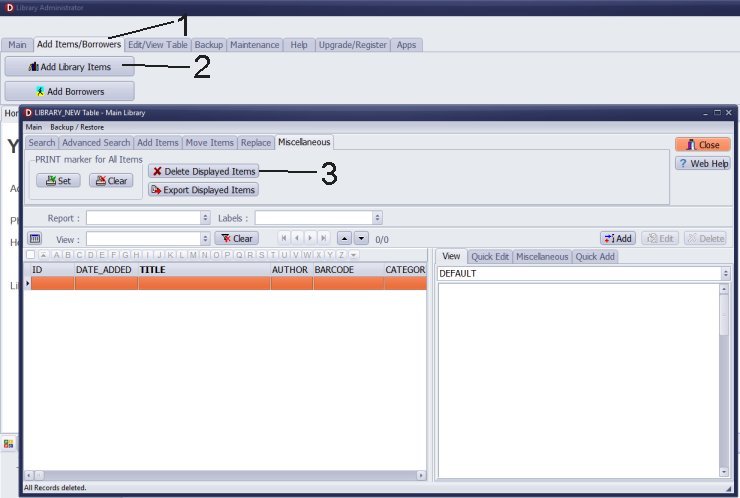
- Navigate to the Add Items/Borrowers tab and click on Add Library Items .
- In the LIBRARY_NEW window, use the Delete Displayed Items option to clear any existing items from the table. This ensures you don't print extra labels.
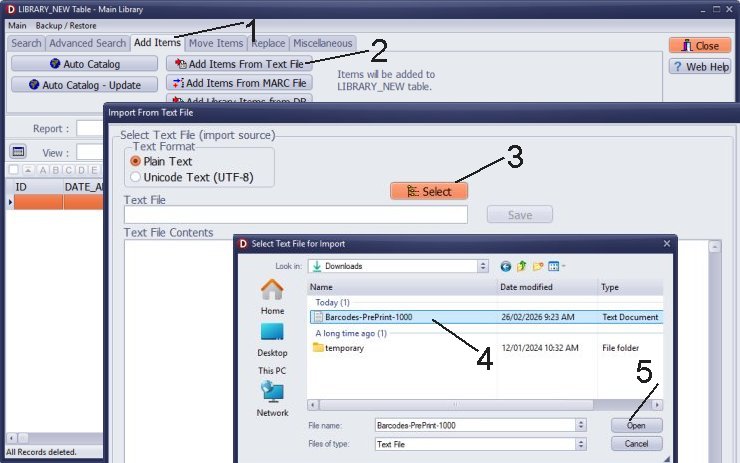
- Click on the Add Items tab, then select Add Items From Text File .
- In the Import From Text File window, click on Select Barcodes-PrePrint-1000.txt (or the appropriate text file you've received).
- Click Next to proceed.
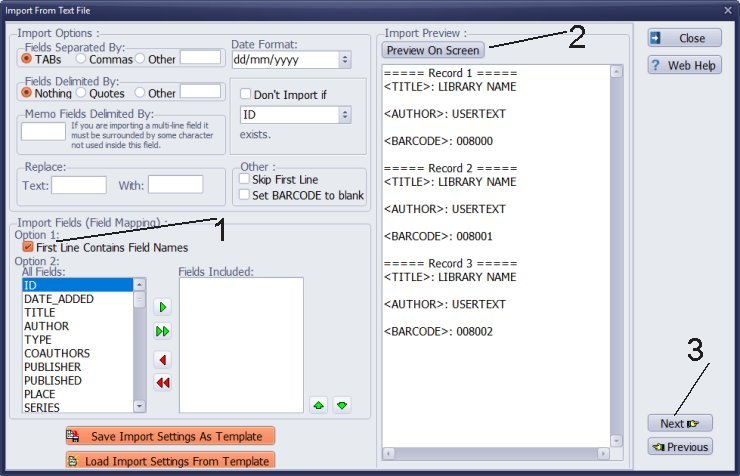
- In the Import Options, check the box for First Line Contains Field Names . This ensures that the import mapping is correctly defined based on the text file.
- Click Preview On Screen to review the data before importing.
- Once satisfied, click Next .
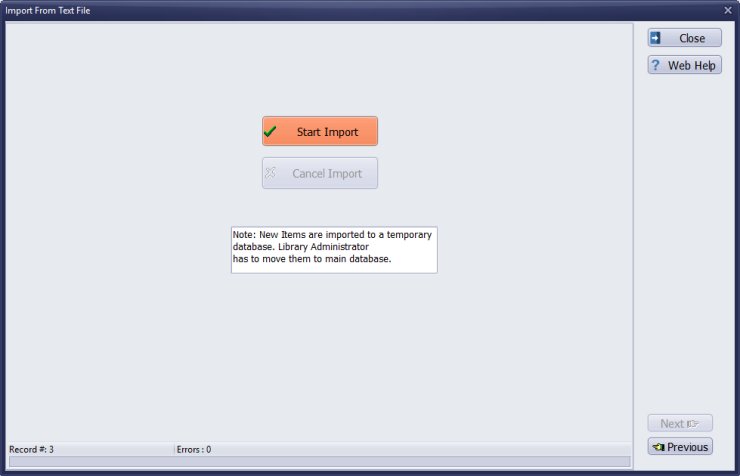
- Click on Start Import to begin importing the barcode data.
- After the import process has been completed, click Close .
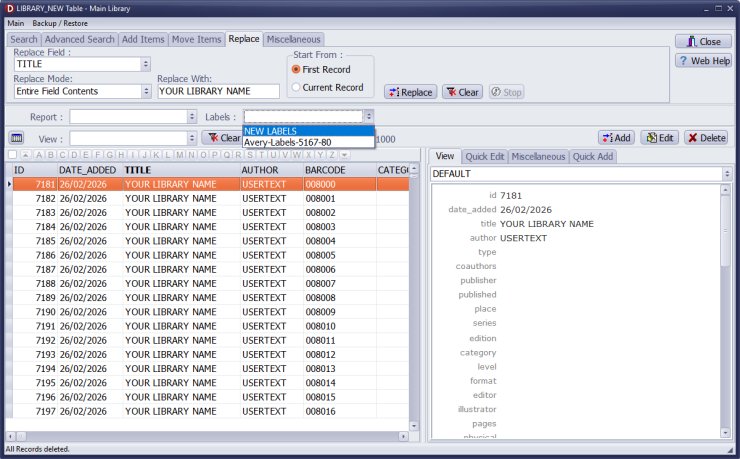
- Click on NEW LABELS to start setting up the barcode label.
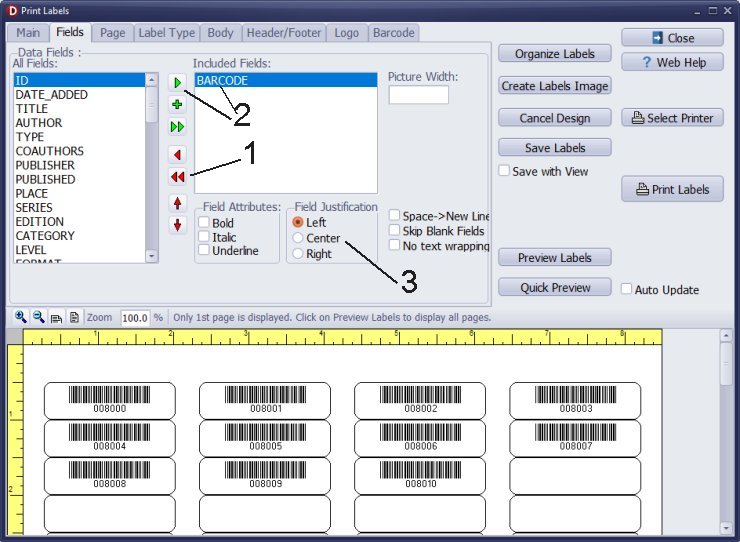
- Click on the double red arrow icon to remove any initial data fields from the label.
- In the All Fields section, select BARCODE and click the green arrow icon to include it on the label. If you’d like to include your library name, you may also select TITLE .
- For Field Justification , select Center to center the text on your label.
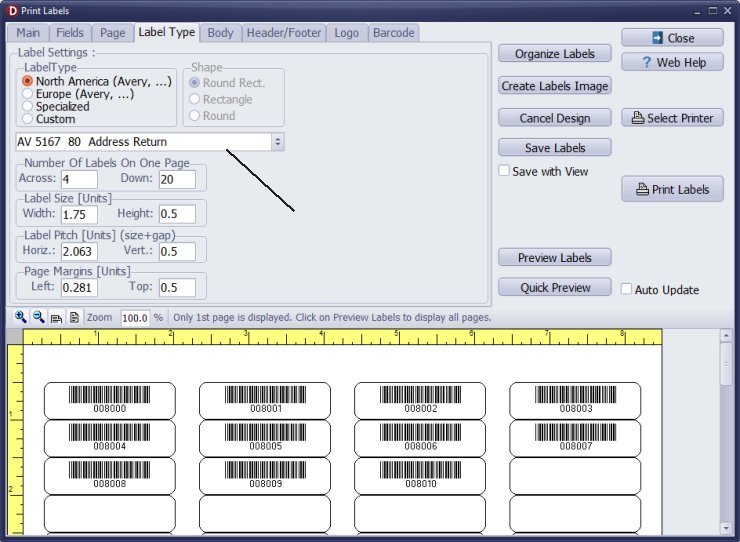
- On the Label Type page, choose the appropriate label type for your needs.
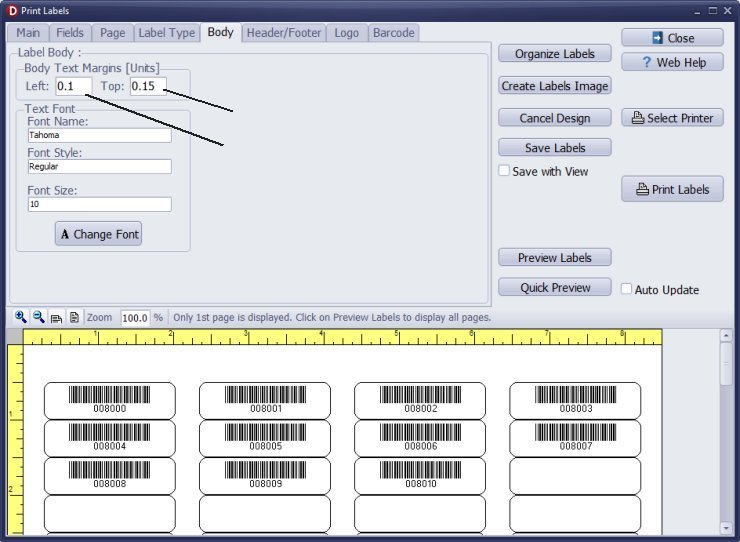
- Go to the Body page to specify the label margins according to your preference.
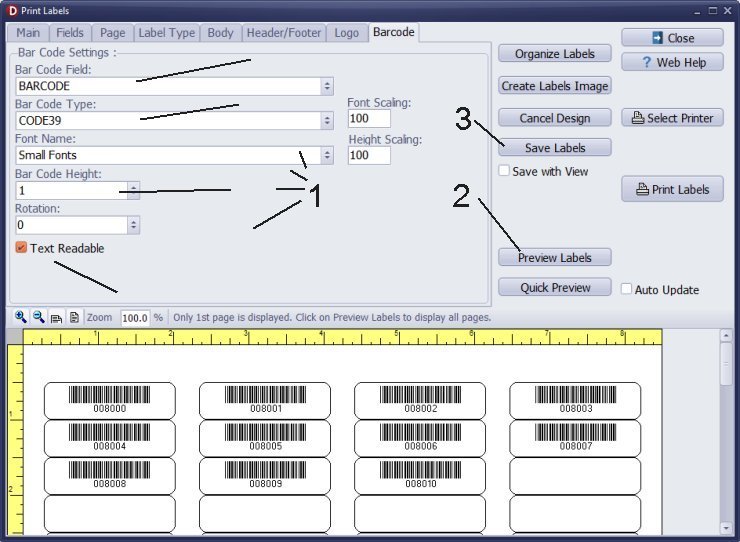
- In the Barcode page, select BARCODE as the item to include.
- For the barcode type, select CODE 39 . Since this is a small label, set the Bar Code Height to 1 to ensure both the barcode and its number are included.
- If you are happy with the label layout, click Save Labels to save it for future use.
- In the Print Labels/Main area, select 1 Record to print a single label.
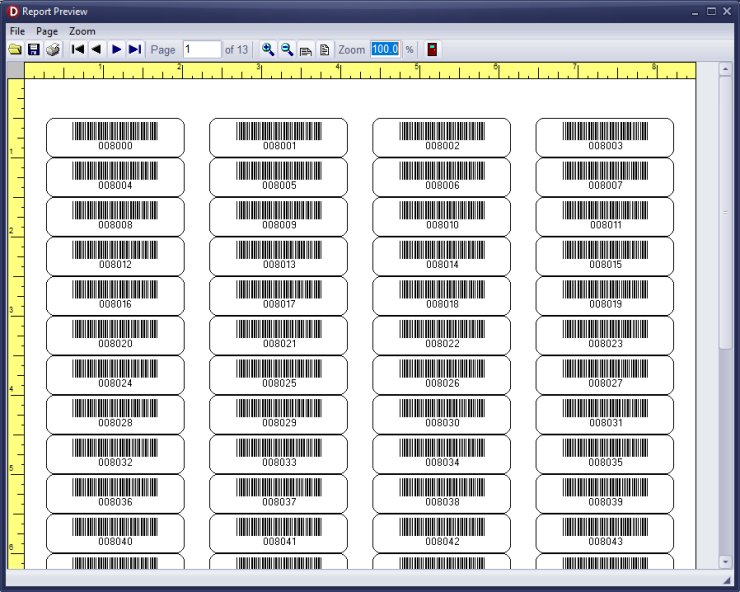
- Conduct a test by scanning the barcode number into the text file to ensure the values match.
- Once confirmed, you can proceed to pre-print all the labels as needed.
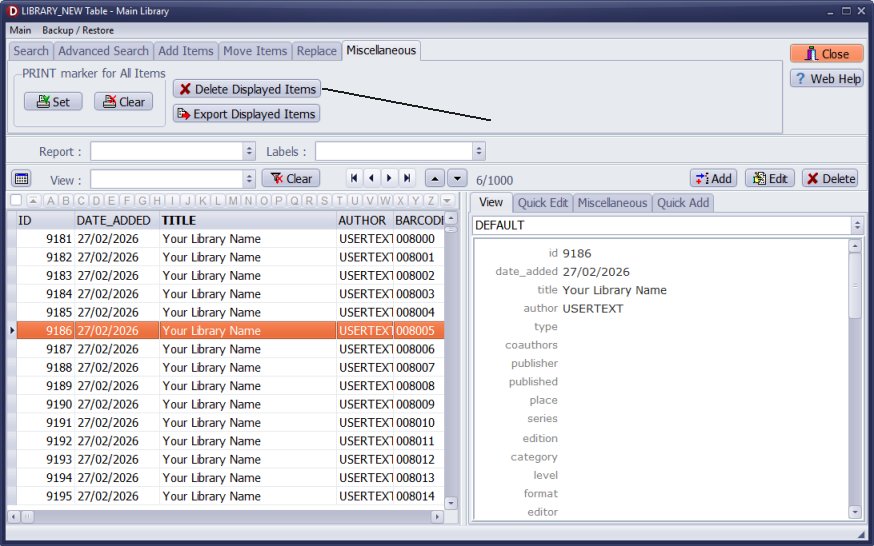
If you are using the LIBRARY_NEW table to add new items before they are transferred to the LIBRARY main table, you can delete the temporary records that were used to pre-print your library barcode labels. To delete, click Delete Displayed Records.
By following these steps, you will effectively create and print barcode labels using Handy Library Manager. If you encounter any issues, refer back to these instructions or consult the help section of the application.
Before printing all your labels, print a single label first and test the scanning functionality with your barcode. We recommend checking the help topic on printing a single label for guidance. Additionally, review the help topic on configuring barcode parameters to ensure everything is set up correctly.
Question:
Handy Library Manager 4.5, review new features
Inquiries from Librarians and Libraries
ISBN Book Finder And Cataloging Tool
Library Web Search, review new web search
How to print replacement labels?
Getting started library video lessons
How to include library name on labels
Library, Data Entry Form Designer
Edit item or borrower data in the check-in/check-out window?
Link item lost fine with the PRICE data field?
Handy v3.2 supports letter tabs?
How to predefine library email messages?
How to update library data from the web with ISBN?
How to predefine library email messages?
Compilation of questions and answers from library requests will help you to make purchase decision.
How to verify if the item is checked out in the library main catalog window?
How to create a new record using Copy Selected Item?
Special Library, how to manage digital and paper document library?
What is the maximum number of library items?
Library Software for Small Libraries, Windows application
Handy Library Manager
small library software
library tour
library features
try now, download
cloud
library software reviews
Copyright © 2026 · All Rights Reserved · PrimaSoft PC